

This tutorial will guide you through the process of setting up an email server on a Windows Server with a static public IP address. The steps outlined here are applicable to both VPS and dedicated servers. The email server software used in this tutorial is hMailServer, a free and open-source program that offers a simple setup process. In addition to the standard features like SMTP, POP3, and IMAP, hMailServer also has spam detection capabilities and can be integrated with a free antivirus solution like ClamWin.
Installation
Step 1: Install NET Framework 3.5
hMailServer requires NET Framework 3.5 to run properly.
Open the Server Manager and follow the prompts to add NET Framework 3.5.
Step 2: Download and Install hMailServer
Download the latest version of hMailServer from the official website.
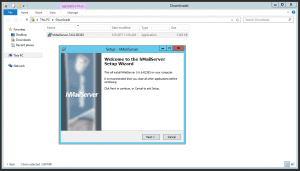
Execute the installation package and accept the terms of service.
Step 3: Configure hMailServer
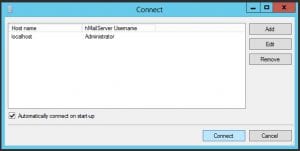
Open the hMailServer Administrator application. Enable the “Automatically connect on Start-up” option and click “Connect”.
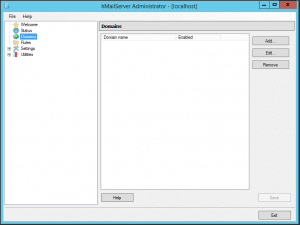
In the next window, go to “Domains”, choose “Add…”, and enter the domain you want to use for sending emails.
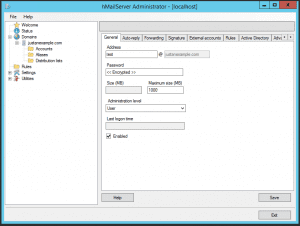
Create new email addresses in the “Accounts” menu.
Go to Settings >> Protocols >> SMTP >> Delivery of e-mail.
Enter the local hostname of your server that will be used to introduce your server to other email servers.
Add an A record to your DNS zone and set an identical PTR for the IP address of your server.
Step 4: Configure Firewall
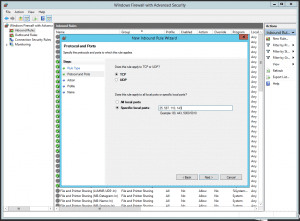
Open Windows Firewall settings and choose “Inbound Rules”.
Click “New Rule” and select “Port”. Enter ports 25, 110, 143, and 587.
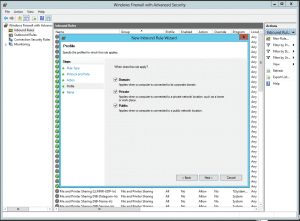
Choose “Allow the connection”, select “Domain”, “Private”, and “Public”, and enter a name for the new rule.
Step 5: Configure DNS
Add an SPF record to your DNS zone:
justanexample.com 86400 in TXT "v=spf1 ip4:1.2.3.4 ~all"
Replace “justanexample.com” with your domain and 1.2.3.4 with your IP address.
Add an MX record to your DNS zone:
justanexample.com 86400 in MX 10 "mail.justanexample.com"
Replace “justanexample.com” with your domain and “mail.justanexample.com” with the hostname you chose for your email server.
Step 6: Configure Email Client
Use the following settings for your email client:
Incoming server:
- Protocol: IMAP
- Port: 143
- Security: None
- Server: The IP or hostname of your server
Outgoing server:
- Protocol: SMTP
- Port: 587
- Security: None
- Server: The IP or hostname of your server
Security
For additional security measures, such as transport encryption, spam checks, and malware protection, refer to the second tutorial: “Email Server in Windows Server, Part 1: Comprehensive Guide”.

