
Mounting an additional hard disk in Linux allows you to expand your storage capacity and utilize the additional space for various purposes, such as storing data, creating backups, or hosting virtual machines. This guide will walk you through the process of mounting an additional hard disk in Linux, including creating a partition, formatting the partition with a file system, mounting the partition in a directory, and automatically mounting the partition after a reboot.
Prerequisites
- A Linux server with an additional hard disk installed
- Root or sudo privileges on the server
Steps
List the recognized disks:
sudo fdisk -l

This command will list all the disks recognized by your system. In our example, we have two disks: /dev/sda, our system disk, and /dev/sdb, the additional hard disk we want to mount.
Create a partition table:
sudo cfdisk /dev/sdb

This command will open the cfdisk graphical interface. If there is no existing partition table on the disk, a menu will pop up. Choose dos to write an MBR partition table to the disk. After that, the main menu of cfdisk will open.
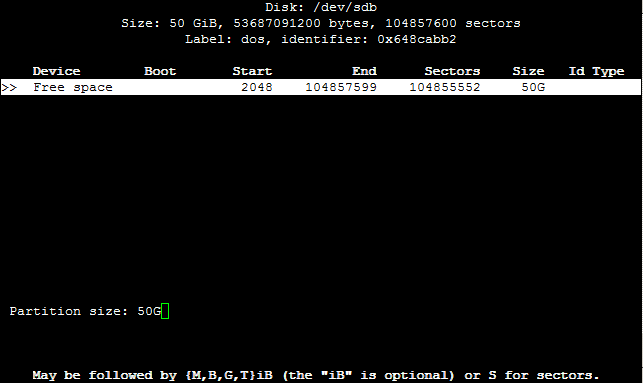
Create a partition:
Enter 50G and confirm with the Enter key to create a 50 GiB partition.
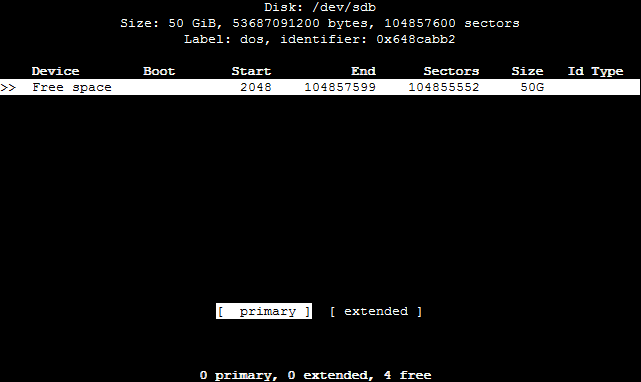
Set the partition type:
Choose primary to create a primary partition.
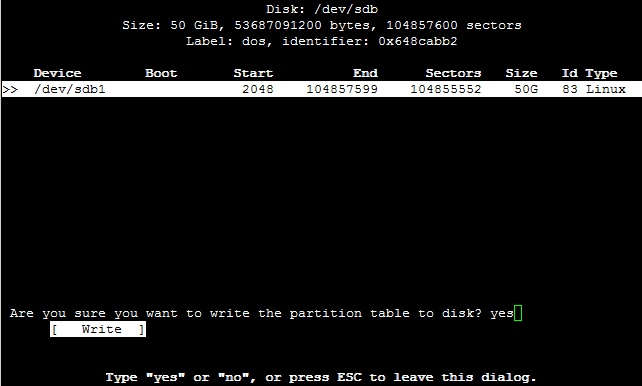
Write the partition table:
Confirm with Write and type in yes to finish creating the partition.
Check if the partition was created properly:
sudo fdisk -l
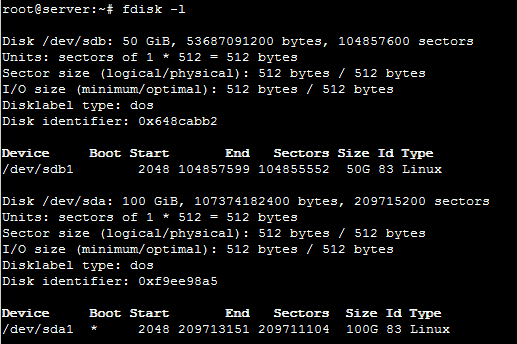
Our new partition is now listed as /dev/sdb1.
Format the partition with a file system:
sudo mkfs.ext4 /dev/sdb1
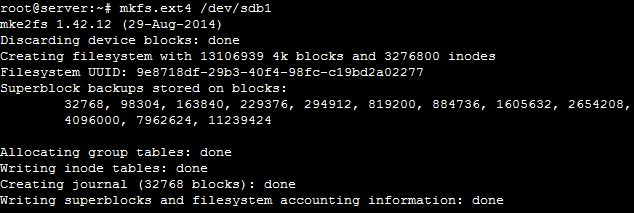
This command will format the partition with the ext4 file system.
Create a mount point:
sudo mkdir /datastore
This command will create a folder named datastore to mount the partition to.
Mount the partition:
sudo mount /dev/sdb1 /datastore
This command will mount the partition to the /datastore folder.
Automatically mount the partition after a reboot:
sudo nano /etc/fstab
This command will open the /etc/fstab file in a text editor. Add the following line to the end of the file:
UUID=d6ae62ff-c9b7-4a07-aea8-a36f55c5036d /datastore ext4 defaults 0 0

Make sure to replace the UUID with your actual one.
Save the changes to the /etc/fstab file.
Reboot your server.
The additional hard disk should now be mounted and accessible.
Additional Considerations
-
Partition Size: When creating a partition, consider the amount of storage space you need. A larger partition will provide more storage capacity, but it may also take longer to format and mount.
-
File System Choice: Ext4 is a commonly used file system, but other options are available, such as XFS and Btrfs. Each file system has its own strengths and weaknesses, so research the options to choose the best fit for your needs.
-
Mount Options: The
defaultsoption in the/etc/fstabentry ensures that the partition is mounted with standard options. You can also specify additional mount options, such asrwfor read-write access orrofor read-only access. -
Permissions: Once the partition is mounted, you may need to adjust the permissions of the mount point directory to allow users or groups to access and modify files stored on the additional hard disk.
Troubleshooting
If you encounter issues while mounting an additional hard disk, consider the following troubleshooting steps:
-
Verify Device Recognition: Check if the hard disk is properly recognized by the system using the
fdisk -lcommand. Ensure the device name is correct. -
Check Partition Table and Format: Use the
fdiskandmkfs.ext4commands to verify that the partition table is properly created and the partition is formatted with a compatible file system. -
Validate Mount Point Existence: Ensure that the mount point directory exists and has appropriate permissions.
-
Review fstab Entry: Double-check the UUID and mount options specified in the
/etc/fstabentry for the partition. -
Check for System Logs: Consult system logs for any error messages related to disk mounting or partitioning.
-
Seek Community Support: If the issue persists, consider seeking assistance from online forums or communities dedicated to Linux system administration.
Conclusion
Mounting an additional hard disk in Linux provides a straightforward way to expand storage capacity and enhance the capabilities of your server. By following the steps outlined in this guide, you can effectively integrate the additional hard disk into your system and utilize it for various purposes, including data storage, backup solutions, or virtual machine hosting.
