
In the realm of web hosting and server administration, the ability to remotely access and manage your server is crucial. Virtual Network Computing (VNC) emerges as a versatile tool for achieving this objective, enabling you to control a remote computer or server using your local keyboard and mouse. This comprehensive guide delves into the process of connecting to your server using VNC, providing in-depth instructions and troubleshooting tips.
Introduction to VNC and Its Significance
VNC, or Virtual Network Computing, stands as a protocol that facilitates the remote control of a computer or server. It operates by transmitting graphical data from the remote machine to your local computer, allowing you to interact with the remote system as if you were physically present. VNC’s compatibility with various operating systems, including macOS, Windows, and Linux, further enhances its appeal.
VNC Clients: The Gateway to Remote Control
To establish a VNC connection, you’ll need a VNC client installed on your local machine. UltraVNC, a popular and freely available VNC client, serves as the tool of choice in this tutorial. However, numerous alternatives exist, such as RealVNC and TigerVNC.
Getting Started with UltraVNC: Initiating the Connection
-
Install UltraVNC Client: Download and install the UltraVNC Viewer application on your local computer.


-
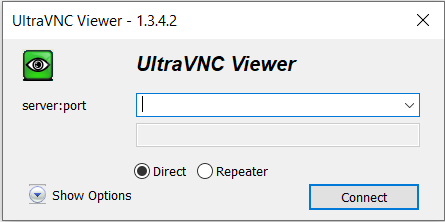
Launch UltraVNC Viewer: Start the UltraVNC Viewer application.
-
Enter VNC Credentials: In the provided dialog box, enter the VNC credentials in the format
<VNC_IP>:<VNC_PORT>. For instance, if your server’s IP address is 0.120.120.120 and the VNC port is 5900, you would enter 0.120.120.120:5900. -
Connect to Server: Click the “Connect” button to initiate the connection to your server.
Locating VNC Credentials
-
Standard Port Number: The default VNC port number is 5900. However, this may vary depending on your server configuration.
-
Contacting Your Provider: If you are unsure about the VNC credentials, contact your server provider for assistance.
-
Retrieving Credentials from Customer Control Panel: For Server Gigabit customers, access the Customer Control Panel and navigate to the “Your Services” page. Locate the server you want to connect to and copy-paste the VNC credentials.
VNC Password Management
-
Changing VNC Password: Server Gigabit customers can easily modify the VNC password by accessing the Customer Control Panel, navigating to the page of their instance, and selecting “Manage” > “VNC Password.”
-
Case Sensitivity: Exercise caution with your VNC login credentials, as they are case-sensitive.
-
Keyboard Layout Verification: To avoid login issues due to keyboard layout differences, enter a few test characters at the login prompt and remove them before entering your actual credentials.
Connecting to Different Operating Systems
-
Connecting to Linux Servers: After entering your password and clicking “Log On,” the command line will appear. Enter your Linux server’s login credentials. If you are a Server Gigabit customer, the default username is typically “root.”
-
Accessing GUI on Linux Servers: If your Linux server is equipped with a GUI, you can launch it after successful login.
-
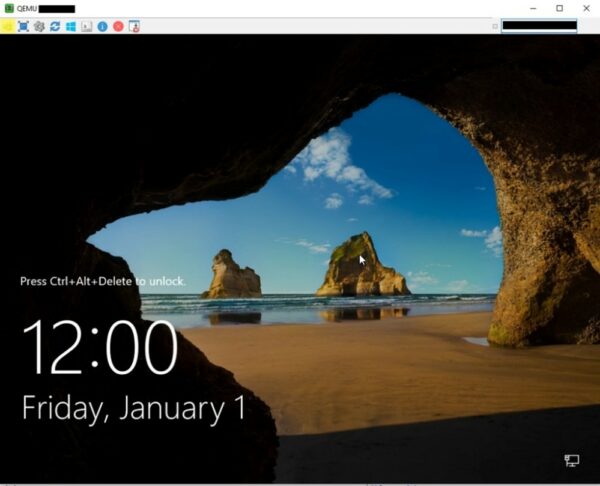
Connecting to Windows Servers: Upon attempting to log in to your Windows Server, a locked screen will appear. Press Ctrl+Alt+Delete to access the password field.


-
Using UltraVNC Control Panel: To enter your password on a Windows server, utilize the special button located on the left side of the UltraVNC control panel.
Handling Non-OS Booting Scenarios
VNC access remains useful even when the operating system on the server is not booting. It allows you to perform tasks like manual file system checks or booting the OS from an alternative kernel.
Troubleshooting VNC: Confronting the Black Screen
If you encounter a black screen after logging in to VNC, simply click on the UltraVNC window and press Enter. This should open the operating system’s login screen.
Ending Your VNC Session
Remember to log out of the VNC session once you have finished working on your server. To log out in Linux, run the command “logout.”
Security Considerations when Using VNC
VNC’s ease of use comes at the cost of reduced security compared to protocols like SSH or Windows Remote Desktop. Under normal circumstances, always opt for these more secure methods when accessing your server. VNC should be reserved for situations when SSH or Remote Desktop are unavailable.
Enhancing VNC Security
Despite VNC’s inherent security limitations, you can implement measures to mitigate risks:
-
Strong Password: Employ a strong and unique password for VNC access.
-
IP Filtering: Restrict VNC access to authorized IP addresses. This can be achieved through firewall configuration or using VNC clients that support IP filtering.
-
SSH Tunneling: Encapsulate VNC traffic within an SSH tunnel to secure the connection. This involves creating an SSH tunnel from your local machine to the server and then connecting to the server’s VNC port via the tunnel.
-
Limited Access: Grant VNC access only to authorized users and limit their access privileges.
-
VPN Usage: Consider utilizing a VPN (Virtual Private Network) to establish a secure connection between your local machine and the server before initiating a VNC session.
Conclusion
VNC provides a convenient and accessible method for remotely controlling your server. However, its inherent security limitations should be considered, and more secure alternatives like SSH or Windows Remote Desktop should be prioritized whenever possible. By implementing appropriate security measures and addressing common troubleshooting issues, you can effectively utilize VNC to manage your server while maintaining a reasonable level of security.
