

In the realm of digital technology, servers play a critical role in providing essential services and storing valuable data. These servers often operate on virtual private servers (VPS) or dedicated servers, each with a distinct disk space allocation. Occasionally, there arises a need to modify the partition layout of the server to accommodate new applications, enhance security, or optimize performance. This guide delves into the process of altering partition layouts on both Linux and Windows operating systems, providing a comprehensive understanding of the procedures involved.
Understanding Partitions and Their Importance
Imagine a laptop with a 500 GB hard drive and Windows as the operating system. By default, Windows is installed on the entire 500 GB disk. However, if you want to install another operating system, such as Linux, you will need to partition the disk to create separate spaces for each operating system.
Essentially, partitions are logically separated sections within a hard drive that act as distinct storage units. They enable users to compartmentalize different types of data, such as the operating system residing on one partition and user files stored on another. This separation offers several advantages, including:
-
Enhanced Organization: Partitions provide a structured approach to data management, making it easier to locate and access specific files.
-
Improved Performance: By isolating the operating system from user files, partitions can optimize performance by preventing interference from excessive data access.
-
Increased Security: Partitioning can enhance security by segregating sensitive data from less critical information, reducing the risk of unauthorized access or data corruption.
Partition Layout Customization: Reasons and Benefits
While virtual private servers (VPS) typically come with pre-configured partitions, there are situations where modifying the partition layout is necessary or beneficial. Here are some common reasons for customizing partition layout:
-
Security Enhancement: Creating a dedicated partition for the
/homedirectory can protect the operating system from potential failures caused by a full/homepartition. -
Data Encryption: Separate partitions allow for selective encryption of sensitive data, safeguarding specific files while maintaining performance for non-critical data.
-
Backup Requirements: Certain backup tools demand dedicated partitions for storing backup data, necessitating partition customization.
-
Virtual Machine Storage Expansion: Following a VPS upgrade, manual partition extension may be required to utilize the newly available storage space.
Please be advised to perform a backup of all important data before proceeding! Changes to the partition table always bear the risk of a complete data loss!
Modifying Partition Layout in Linux and Windows
The process of modifying partition layout varies depending on the operating system. Here’s a step-by-step guide for both Linux and Windows:
Linux:
Expanding an Existing Partition
If you have upgraded your VPS so that it has more storage space, you can expand an existing partition to use the new space. For Debian and Ubuntu users, this can be done using the cloud-utils package.
- Install the cloud-utils package:
sudo apt install cloud-utils -y
- Find the name of the partition you want to expand:
mount | grep ' / '
- Expand the partition:
sudo growpart /dev/sda 1
sudo resize2fs /dev/sda1
Customizing the Partition Layout
To make more complex changes to the partition layout, you will need to boot your VPS into the rescue system. Once you are in the rescue system, you can use the GParted tool to resize, create, and delete partitions.
- Boot your VPS into the rescue system.
- Connect to your VPS through VNC and log in as “root” and the password you set for the rescue system.
- Start the graphical user interface (GUI) by typing “startxfce4” and pressing Enter.
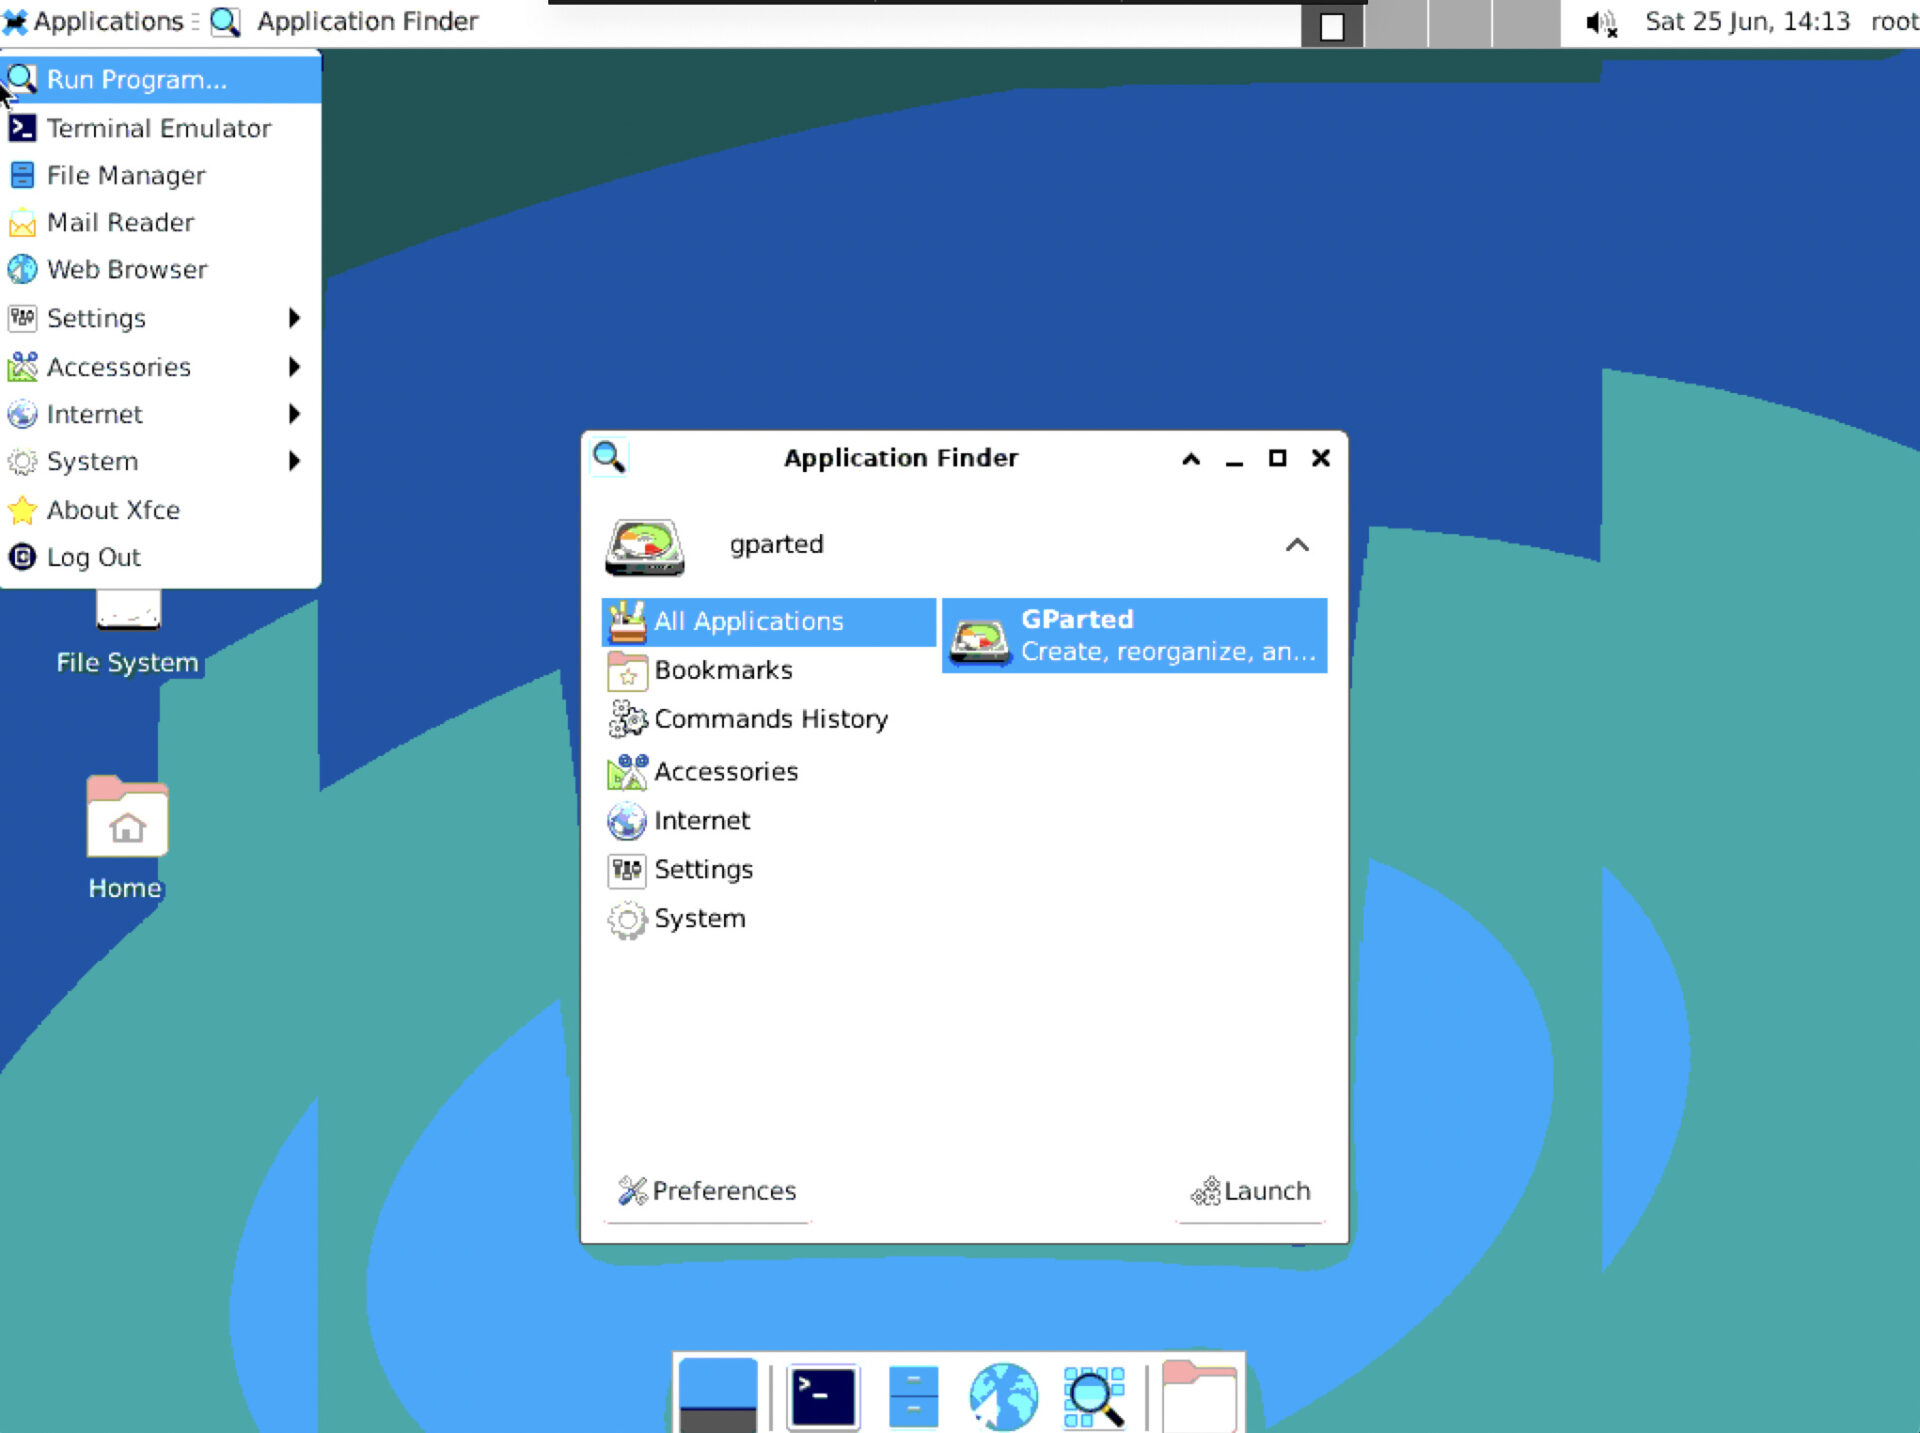
- Open GParted by clicking on “Applications” in the top left corner, then selecting “Run program”, typing “GParted”, and pressing Enter.

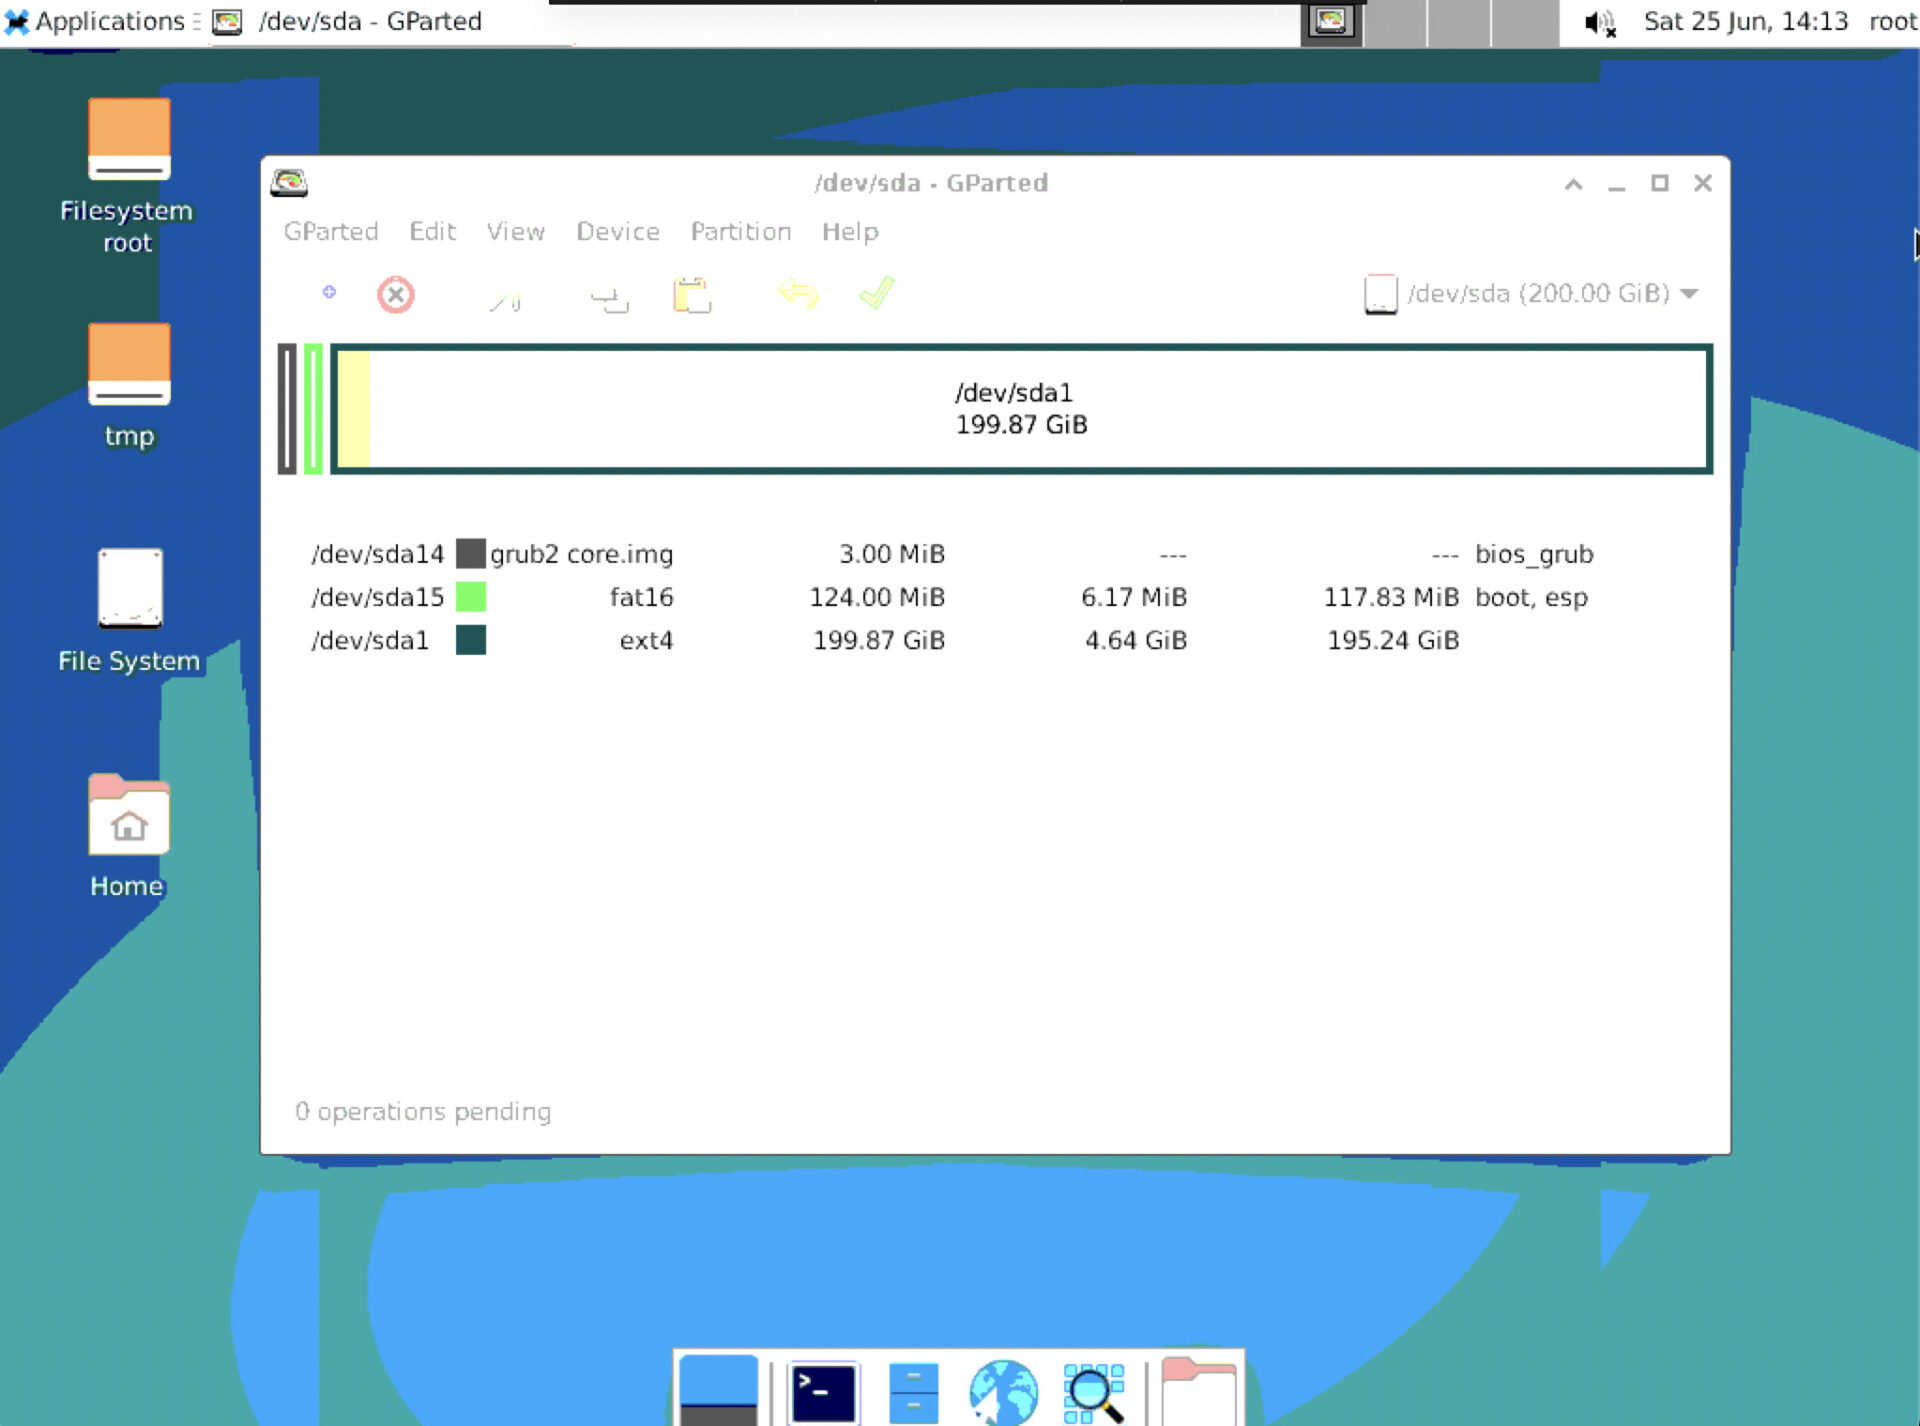
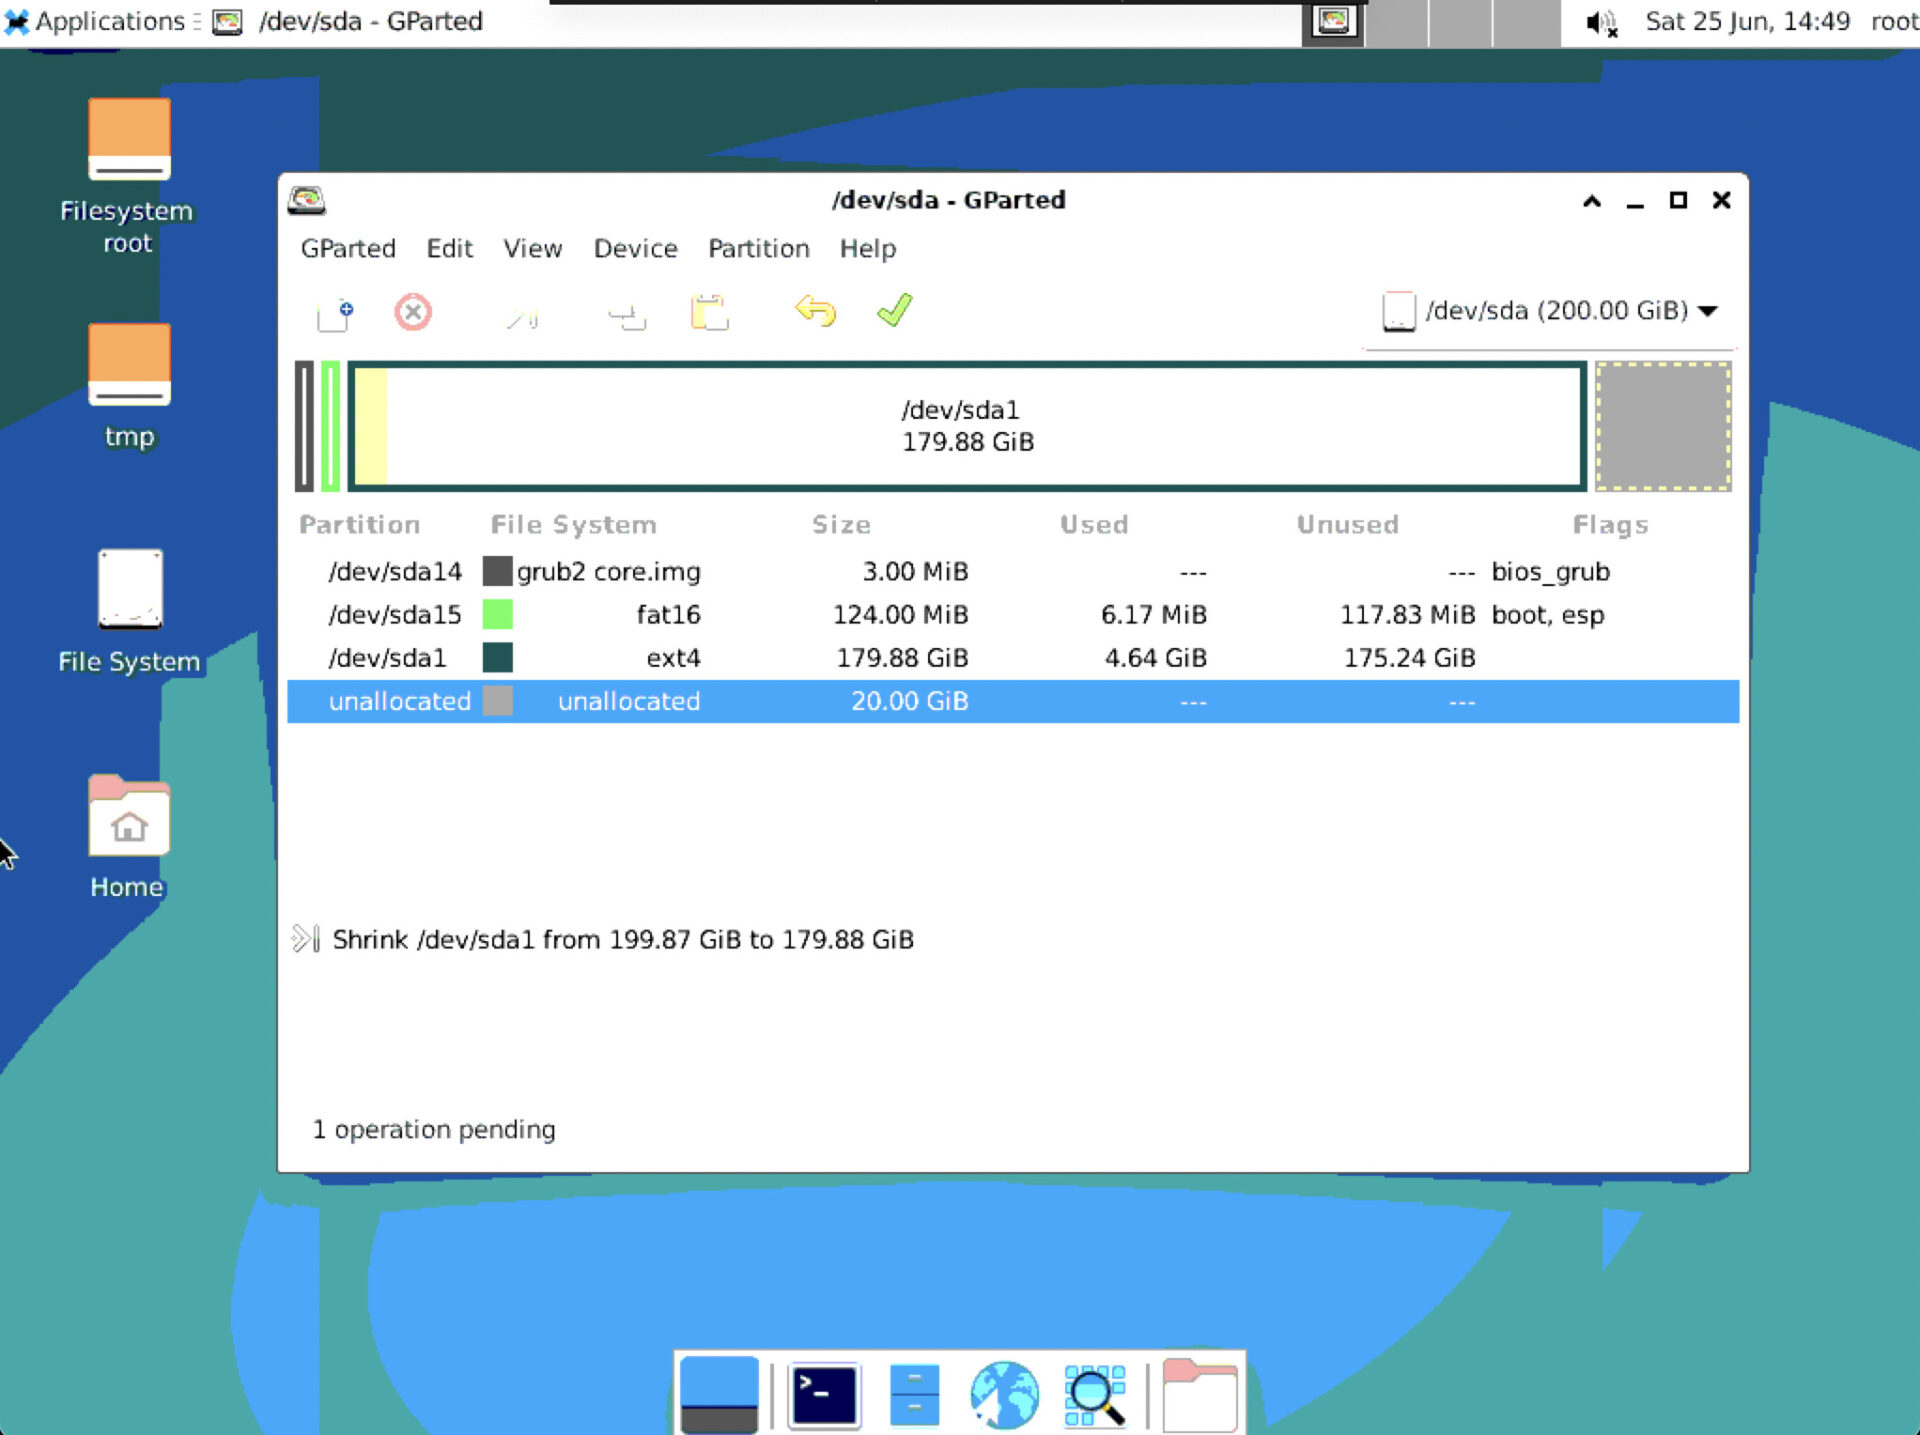
- Select the partition you want to change and make the desired changes.

- To apply the changes, click on the green tick symbol.

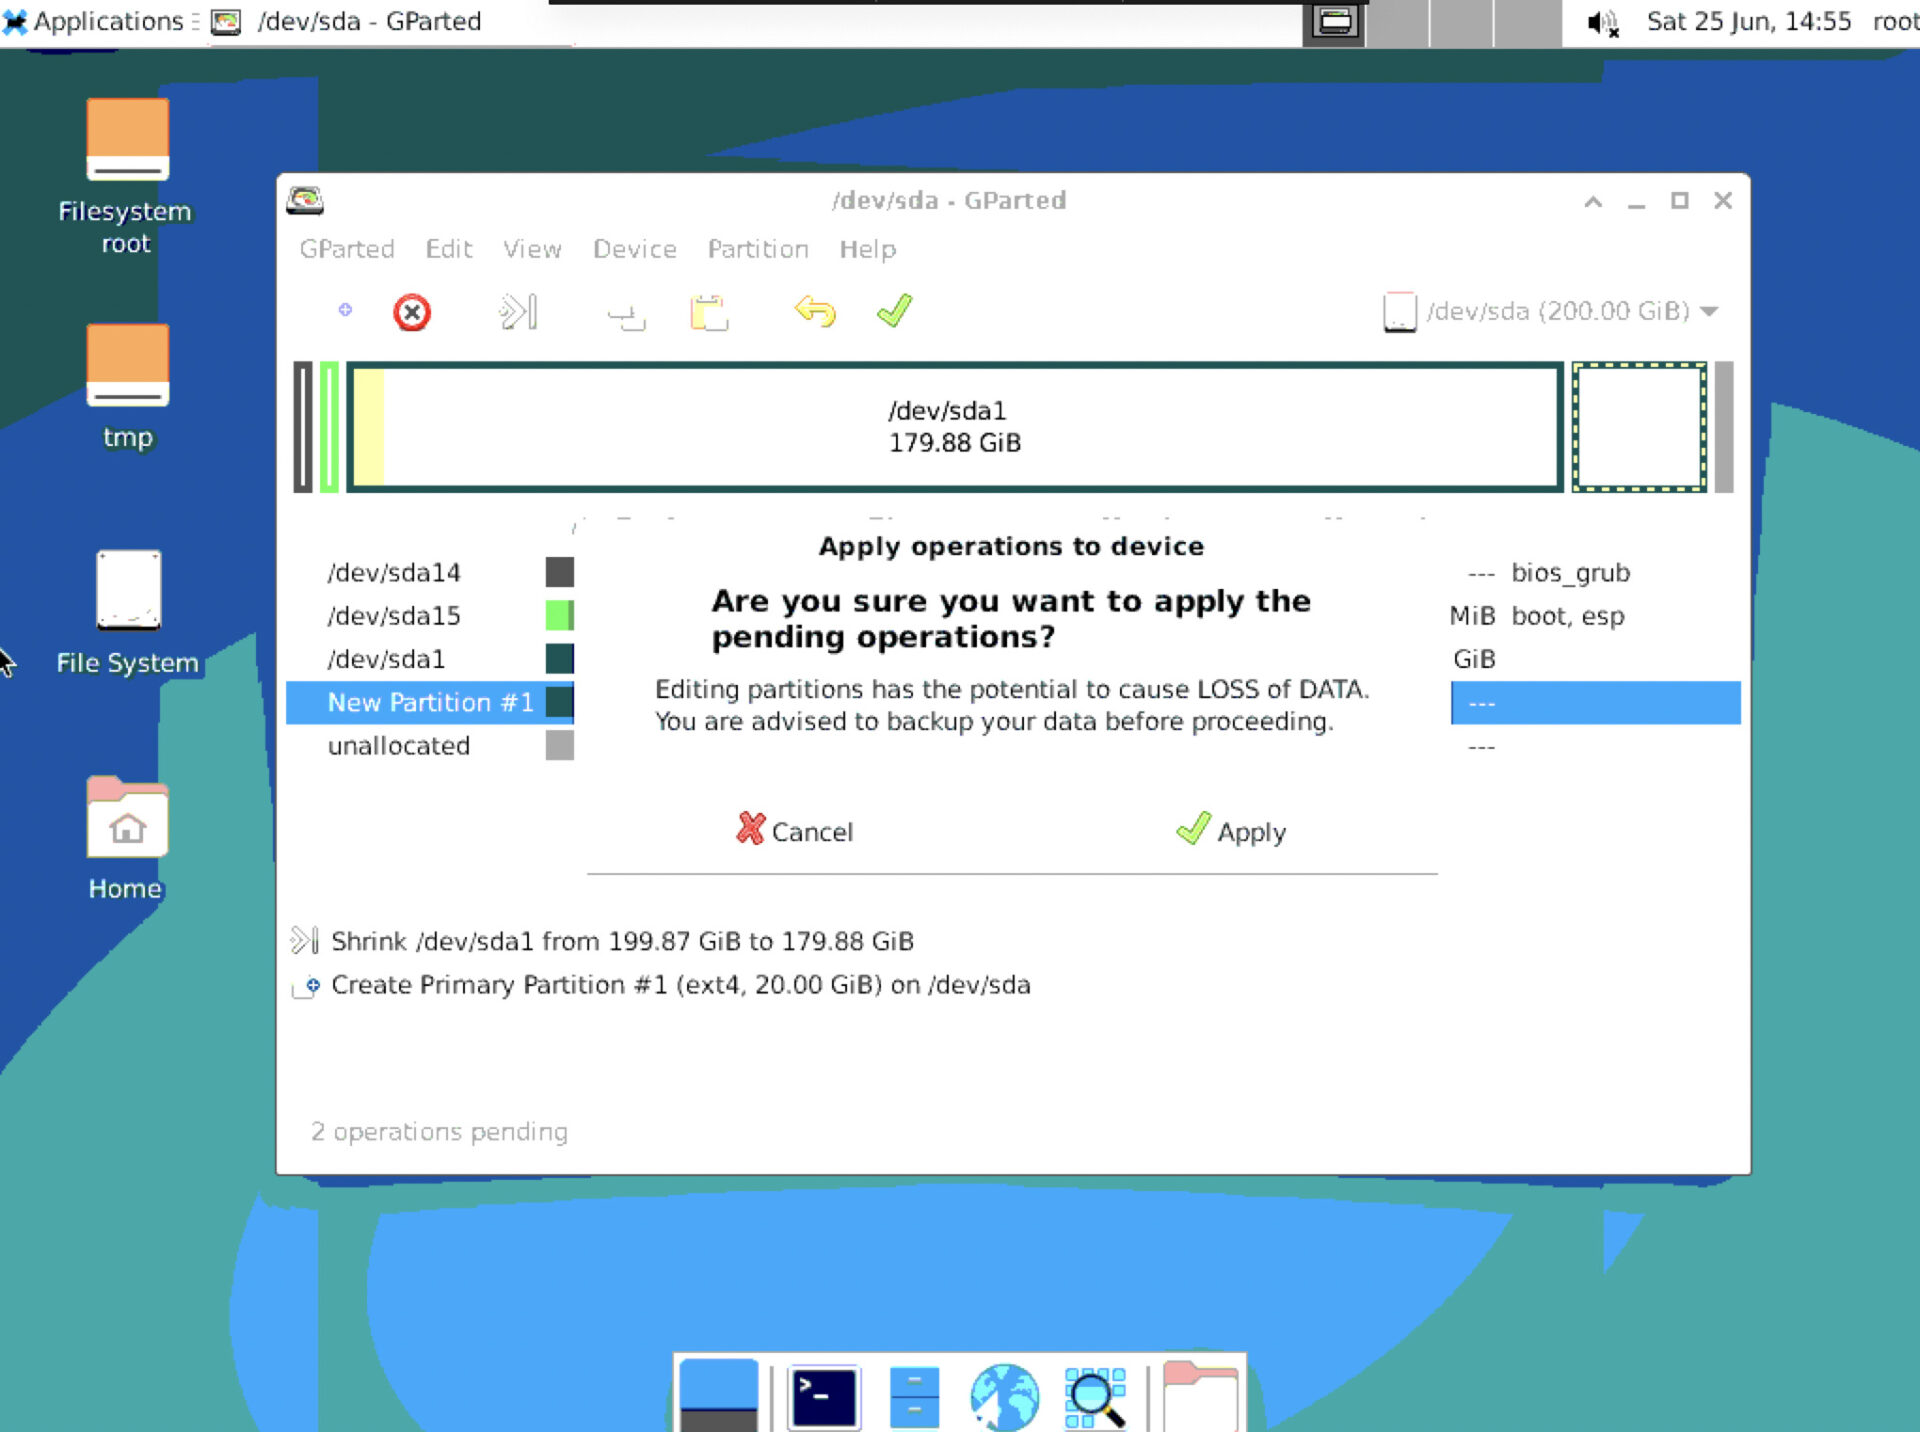
- Click on “Apply” to confirm the changes.

- Restart your VPS.
Additional Steps for LVM
If you are managing your partitions with Logical Volume Management (LVM), you will need to follow additional steps to extend the size of a partition.
- Activate the volume:
sudo lvchange -a y <LV_Name>
- Check the available space:
sudo vgs
- Extend the volume:
sudo lvextend -l +100%FREE <LV_NAME>
- Resize the filesystem:
sudo resize2fs <LV_Name>
Windows
Expanding an Existing Partition
- Connect to your VPS with RDP.
- Open Disk Management.
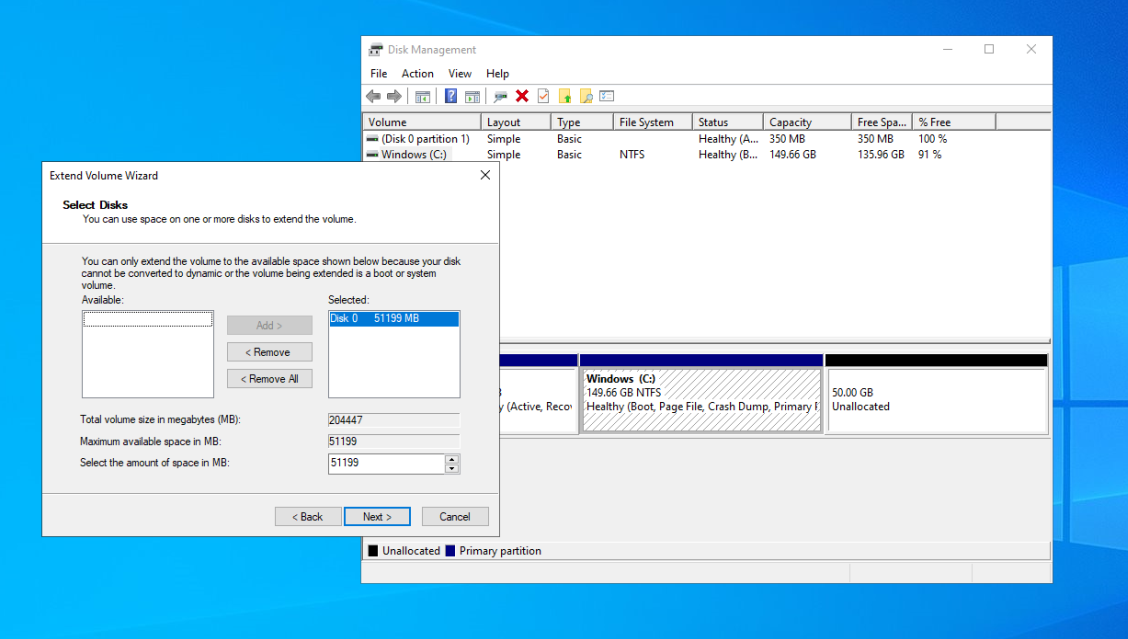
- Right-click on the partition you want to expand and select “Extend Volume”.
- Select the disk you want to expand the partition into.
- Choose how much space you want to add to the partition.
- Click “Next” and then “Finish”.

Modifying Existing Partitions
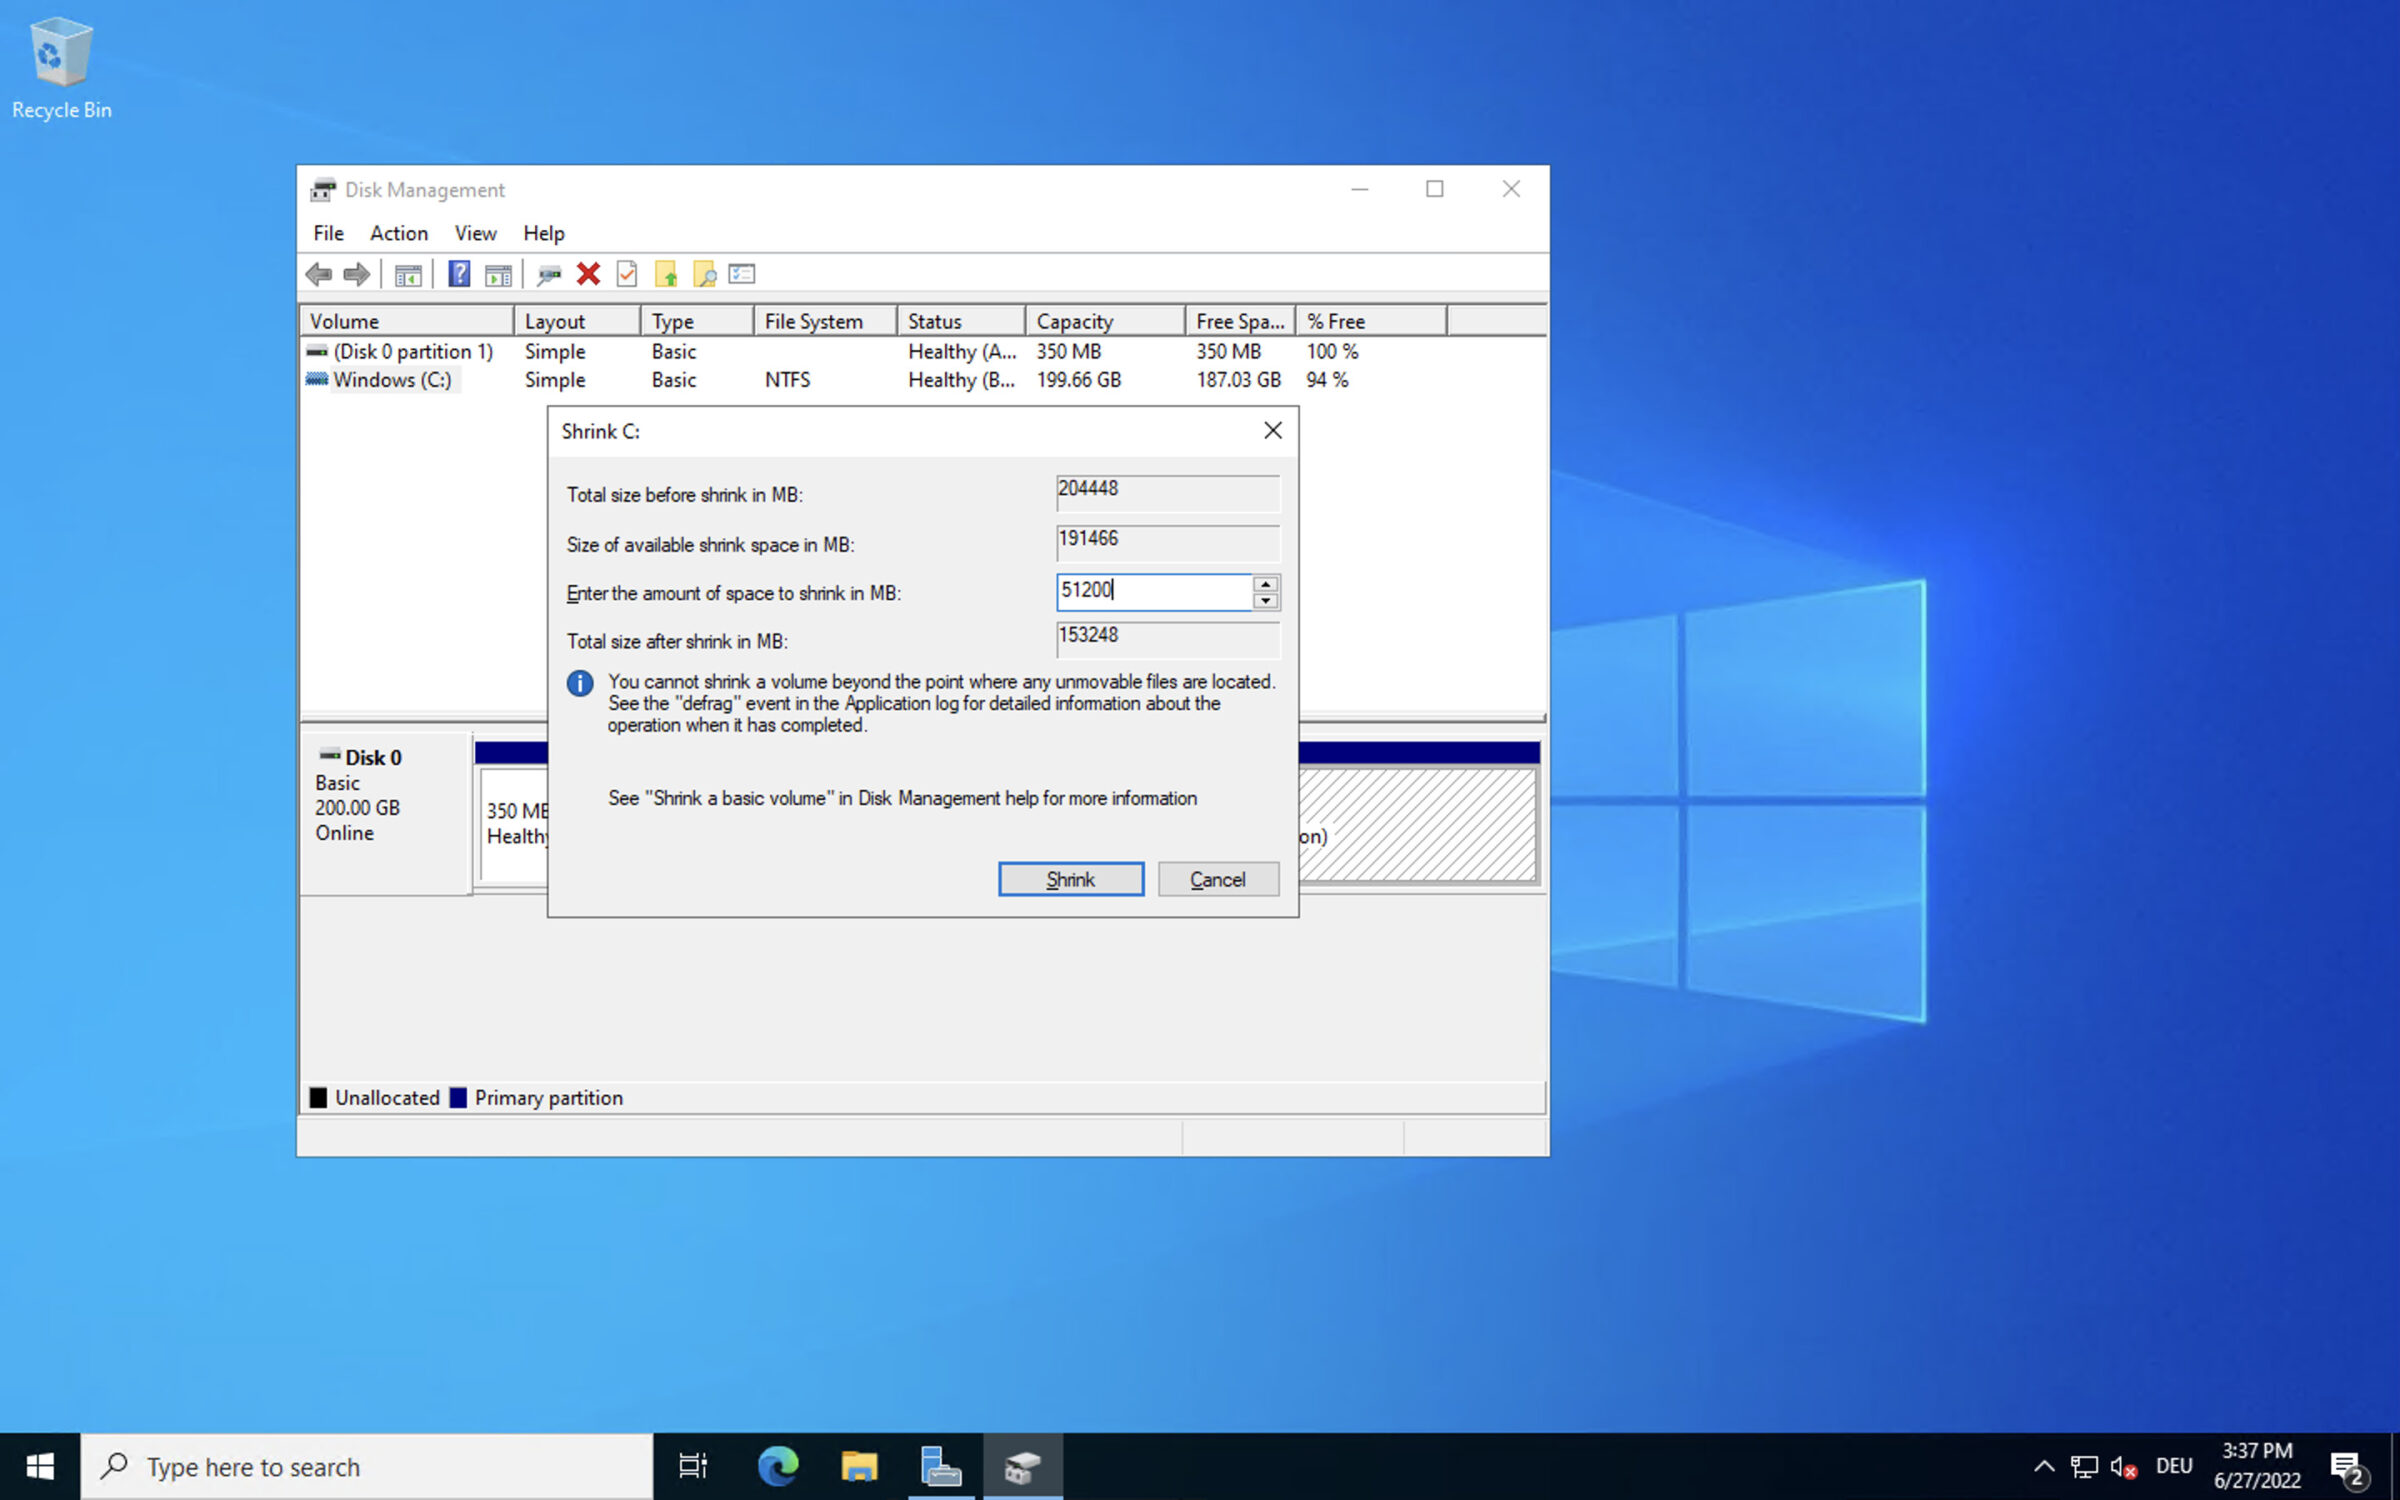
- Right-click on the partition you want to change and select “Shrink Volume” or “Extend Volume”.
- Choose how much space you want to add or remove from the partition.
- Click “Shrink” or “Extend” to confirm the changes.

Creating New Partitions
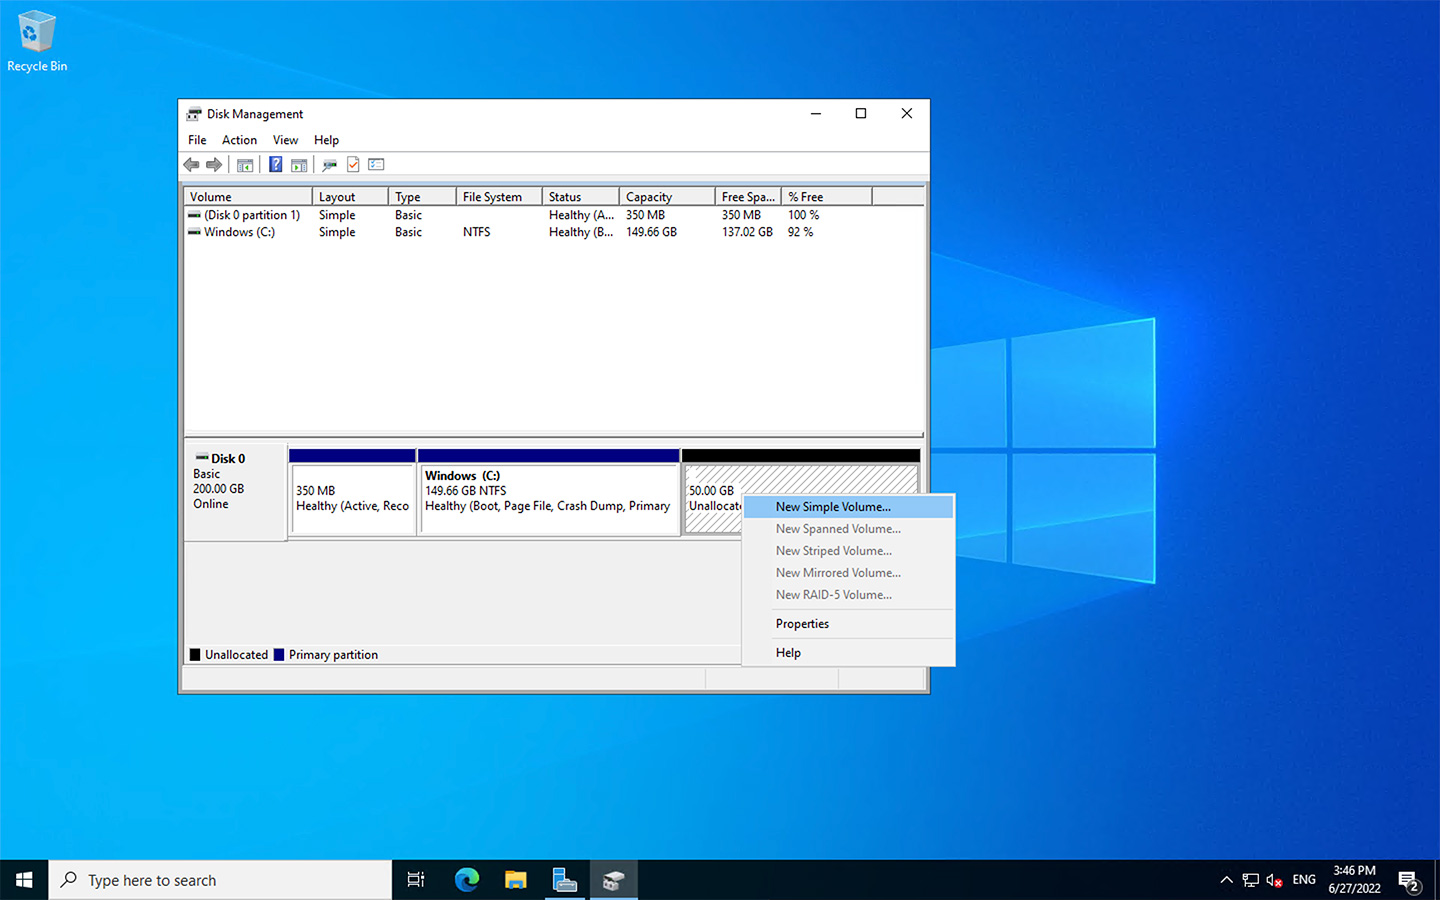
- Right-click on the unallocated space in the disk overview and select “New Simple Volume”.

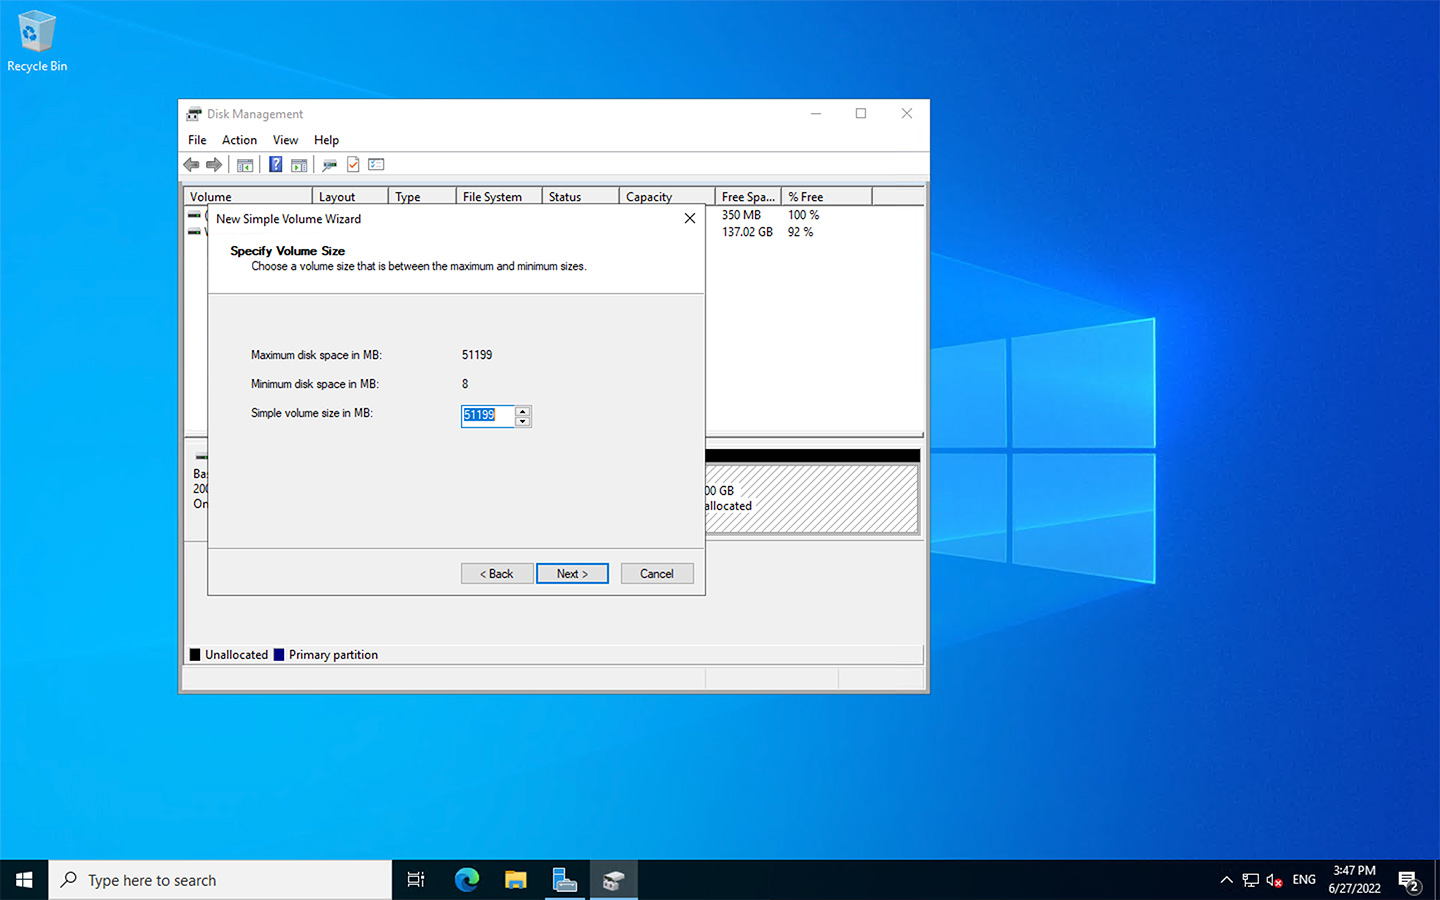
- Choose how much space you want to allocate to the new partition.

- Customize the new partition in the following windows.

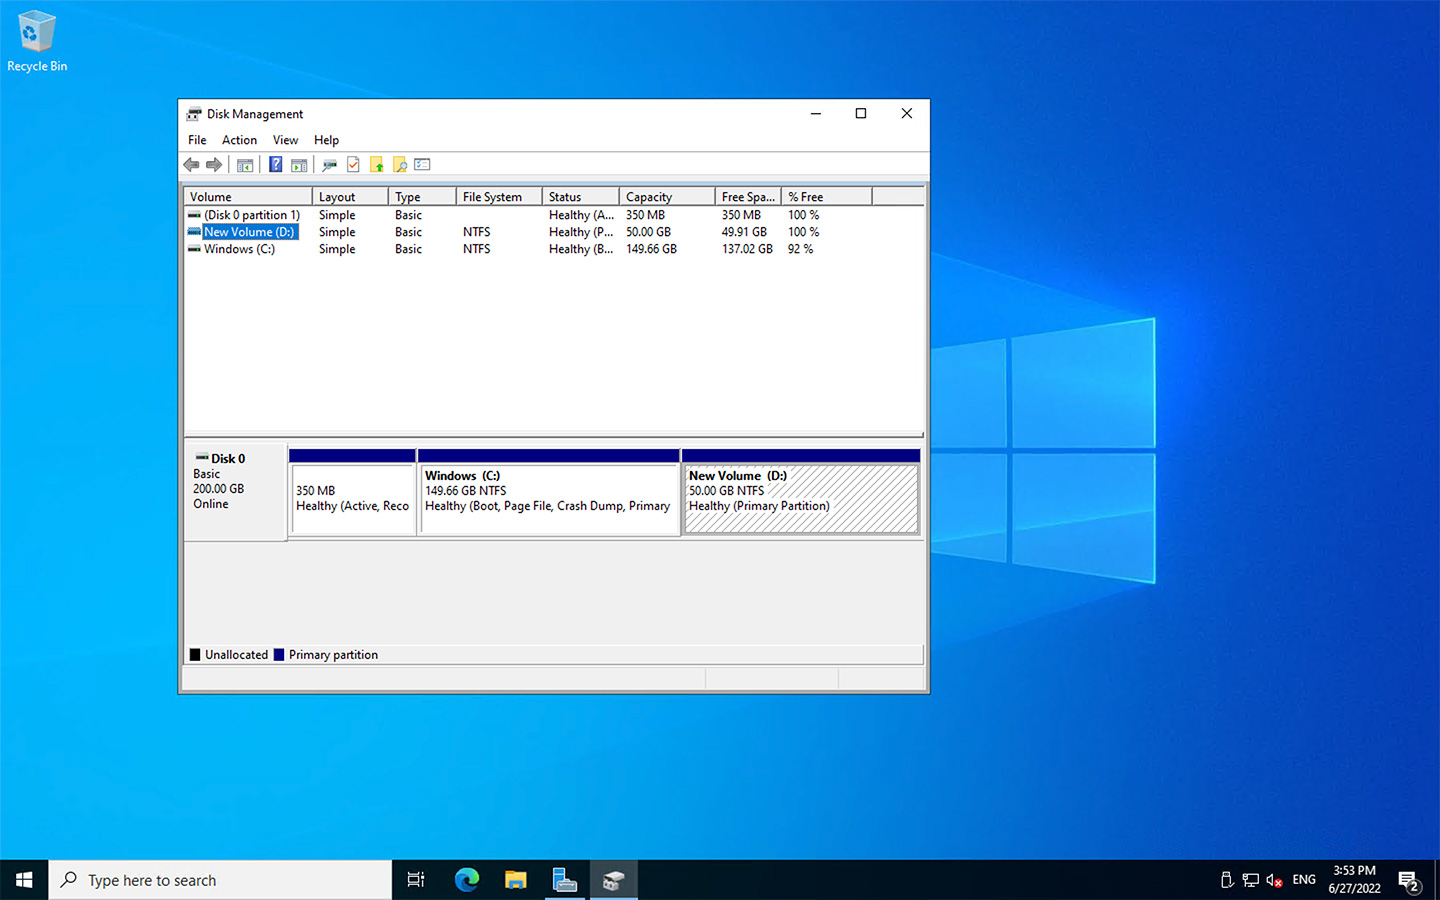
- Click “Finish” to create the new partition.
Conclusion
Changing the partition layout of your VPS is a relatively straightforward process, but it is important to be careful and to make sure that you have a backup of your data before you start. By following the steps in this guide, you can easily customize the partition layout of your VPS to meet your specific needs.
