
This comprehensive guide will walk you through the process of checking, managing, and configuring Windows updates in Windows Server 2012. Keeping your server’s operating system up to date is crucial for maintaining system security, stability, and optimal performance.
Prerequisites
Before proceeding, ensure that you have the following:
-
A Windows Server 2012 system with administrative privileges.
-
Remote Desktop Protocol (RDP) access to the server.
Steps
Access the Windows Update Control Panel
a. Connect to your Windows Server 2012 system using RDP.
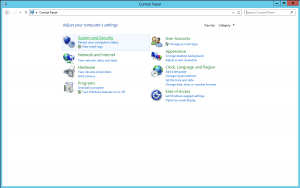
b. Open the Control Panel.
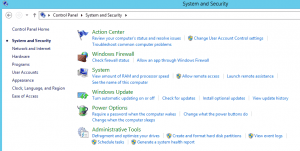
c. Click the “System and Security” category.


d. Under the “Protection” section, click “Windows Update”.


Check for Updates
a. In the Windows Update window, click the “Check for updates” button.


b. Windows will automatically scan for available updates.
c. If updates are found, you will be presented with a list of updates to install.
Change Update Settings
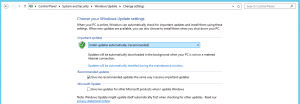
a. In the Windows Update window, click the “Change settings” button.


b. In the “Important updates” section, select the desired automatic update option:


c. In the “Recommended updates” section, you can choose to receive notifications for recommended updates.
d. In the “Microsoft Update” section, you can opt-in to receive notifications for updates from Microsoft Update.
View Update History
a. In the Windows Update window, click the “View update history” link.


b. This will display a list of all updates that have been installed on your server.
c. You can uninstall updates by selecting them and clicking the “Uninstall” button.
Troubleshoot Update Issues
a. In the Windows Update window, click the “Troubleshoot problems with installing updates” link.
b. This will launch a troubleshooting tool that will identify and attempt to resolve any issues related to update installation.
Restore Hidden Updates
a. In the Windows Update window, click the “Restore hidden updates” link.


b. This will display a list of updates that were hidden but not installed.
c. You can choose to install any of these updates by selecting them and clicking the “Restore” button.
Additional Considerations
-
Scheduled Maintenance: You can configure a maintenance window for automatic update installation by clicking the link “Updates will be automatically installed during the maintenance windows.”
-
Wake-on-LAN: The option “Allow scheduled maintenance to wake up my computer at the scheduled time” ensures that your server starts automatically to perform maintenance/updates.
-
Update Notifications: Enable notifications for recommended updates and Microsoft Update to stay informed about important updates.
Conclusion
By following the steps outlined in this guide, you can effectively manage Windows updates in Windows Server 2012, ensuring that your server remains up-to-date, secure, and performing at its best. Remember to regularly check for updates and apply them promptly to maintain a robust and secure server environment.
