This is a follow-up to the tutorial “Email Server in Windows Server, Part 2: Comprehensive Guide”, directed to those who already have an hMailserver and want to increase the security. In this guide, you will learn how to secure your email server in Windows Server. We will cover topics such as spam protection, malware protection, and TLS encryption. By following these instructions, you can effectively safeguard your server from malicious activities and ensure the integrity of your email communications.
Spam Protection
-
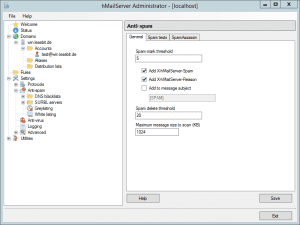
Navigate to Settings >> Anti-spam in the hMailserver Administrator.
-
In the “Spam tests” tab, enable all four spam detection parameters:
- Use SPF (3)
- Check host in the HELO command (2)
- Check that sender has DNS-MX records (2)
- Verify DKIM-Signature header (5)
Malware Protection
-
Integrate ClamWin antivirus software into hMailServer.
-
Download and install ClamWin from its official website: https://sourceforge.net/projects/clamsentinel/
-
Configure hMailServer’s anti-virus settings:
-
Navigate to Settings >> Anti-Virus >> ClamWin in the hMailserver Administrator.
-
Click “autodetect” to automatically locate the ClamWin installation directory.
-
Click “Save” to finalize the integration.
-
TLS Encryption
-
Enable TLS encryption to secure email connections.
-
Obtain an SSL certificate for your server’s hostname.
- Create a self-signed certificate using XCA: https://sourceforge.net/projects/xca/
-
Generate a new certificate using XCA:
-
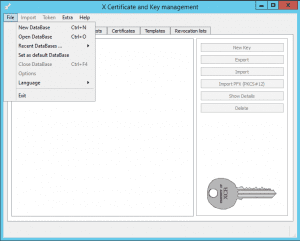
Open XCA and create a new database.
-
Navigate to the “Certificates” tab.

-
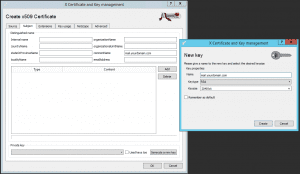
Click “New Certificate” and enter your server’s hostname under “CommonName”.
-
Click “Generate a new key” to create a key for the certificate.
-
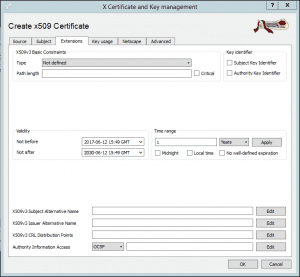
Finalize the certificate creation by clicking “Create”.

-
-
Export the certificate and key:
-
In the “Certificates” tab, select the certificate and click “Export”.

-
Maintain the default path for exporting the certificate.
-
Repeat the process for exporting the private key.
-
-
Import the certificate and key into hMailServer:
-
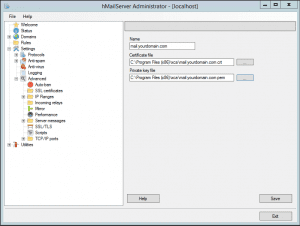
Open the hMailServer Administrator and navigate to Settings >> Advanced >> SSL certificates.
-
Click “Add” and select the previously exported certificate and key.
-
Save the settings.

-
-
Modify TCP/IP port settings:
-
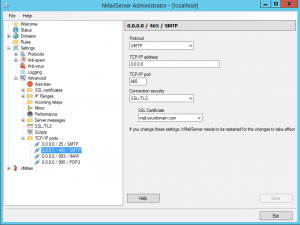
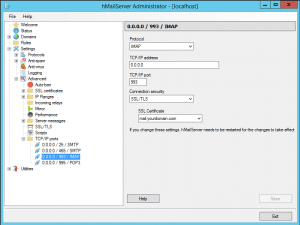
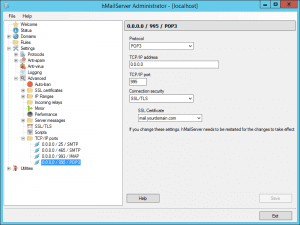
Navigate to Settings >> Advanced >> TCP/IP ports in the hMailServer Administrator.
-
Modify the three entries below “0.0.0.0 / 25 / SMTP” as shown in the images provided.
-
Save the settings.
-
-
Open the modified ports in your firewall:
-
Edit the firewall rule named “Ports for hMailServer”.
-
Change the “Local ports” from 25, 110, 143, 587 to 25, 465, 993, 995.





-
-
Update email client settings:
-
Incoming server:
- Protocol: IMAP
- Port: 143
- Security: SSL/TLS
- Server: The IP or hostname of your server
-
Outgoing server:
- Protocol: SMTP
- Port: 587
- Security: SSL/TLS
- Server: The IP or hostname of your server
-
Conclusion
By following the comprehensive instructions provided in this guide, you can effectively secure your email server in Windows Server. By implementing spam protection, malware protection, and TLS encryption, you can safeguard your server from malicious activities and ensure the integrity of your email communications.


