In the realm of virtualization platforms, Proxmox stands out as a versatile and open-source solution, offering a wealth of features for managing and deploying virtual machines. Based on the Debian Linux distribution, Proxmox provides a user-friendly web interface and a robust command-line interface, catering to both novice and experienced users. This comprehensive guide delves into the fundamentals of Proxmox, enabling you to embark on your virtualization journey with confidence.
Proxmox: An Overview
Proxmox, also known as Proxmox VE or PVE, is a virtualization platform that empowers you to create and manage virtual machines (VMs) on a single physical server. These VMs act as independent computers, each running its own operating system and applications, while sharing the physical resources of the underlying hardware. This approach offers numerous advantages, including efficient resource utilization, improved isolation, and enhanced flexibility for testing and deployment scenarios.
Eliminating Costs with Open-Source Software
Unlike several other virtualization solutions, Proxmox embraces the open-source philosophy, eliminating the need for additional licensing costs. This makes it a cost-effective option for both personal and professional use, particularly for organizations with limited budgets.
Navigating the Proxmox Web Interface
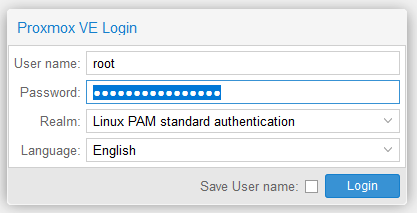
Upon successful installation, the Proxmox web interface becomes accessible via the port 8006. To access it, simply enter https://[YourIP]:8006/ into your web browser, replacing [YourIP] with the IP address of your Proxmox server. For authentication purposes, utilize the ‘root’ username and the corresponding Linux root password.
Exploring the Four Main Components
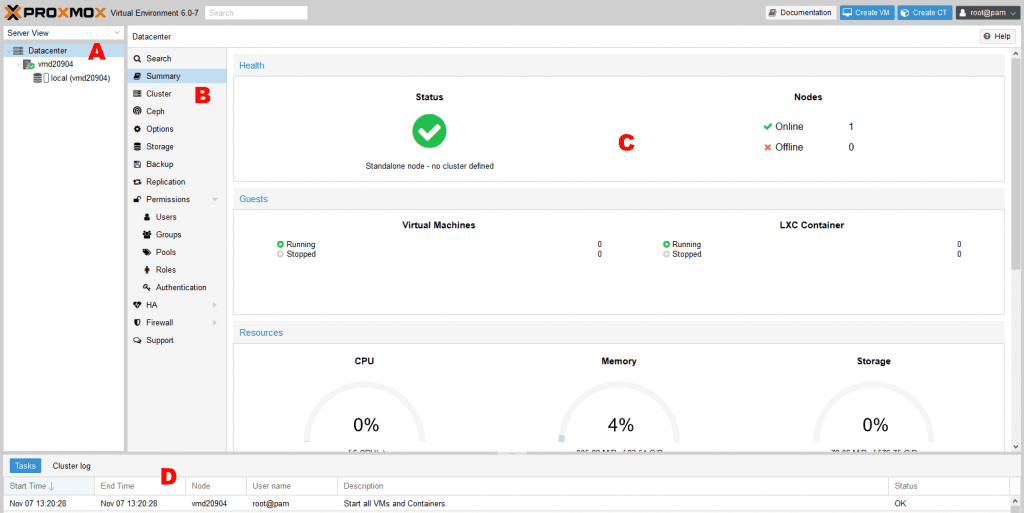
The Proxmox web interface is divided into four primary sections:
-
Server and Pool List (Sector A): Provides a comprehensive overview of the installed virtual machines and pools.
-
Menu Bar (Sector B): Offers a range of menus associated with the selected object, displaying detailed information and configuration options.
-
Content Area (Sector C): Presents the specific information or settings related to the selected object.
-
Log Button (Sector D): Provides access to event logs and status messages for the selected object.
Uploading an ISO Image for VM Installation
To prepare for installing your VMs, it is recommended to upload the ISO image of the desired operating system. This image serves as the installation media for your virtual machines.
-
Choose the Image Storage Location: Select the location where you want to store the ISO image. In this example, only one location named ‘local’ (1) is available.
-
Access the Content Menu: Within the associated menu bar, click on ‘Content’ (2).
-
Initiate the Upload Process: Click on the ‘Upload’ button (3). A pop-up menu will appear, allowing you to upload local files.

Creating a Virtual Machine
Proxmox simplifies the process of creating virtual machines, enabling you to allocate resources and configure settings with ease.
-
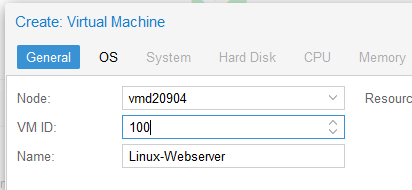
Launch the Create VM Wizard: Click on the ‘Create VM’ button located in the upper right corner of the web interface.

-
Assign a VM ID: Under the ‘General’ tab, select a unique ID for your VM. This ID can only be used once per host system and serves as an identifier for the VM.

-
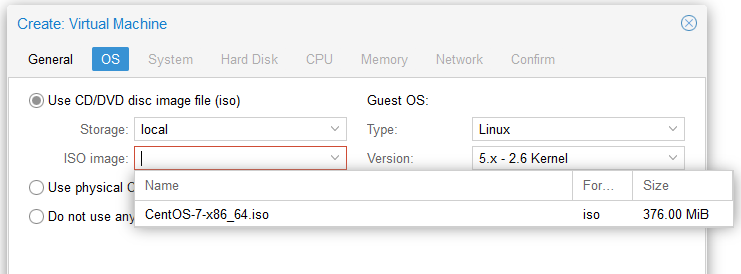
Choose the Operating System Image: Navigate to the ‘OS’ tab and select the previously uploaded ISO image. Alternatively, you can create the VM without an installation media and perform the installation at a later stage.

-
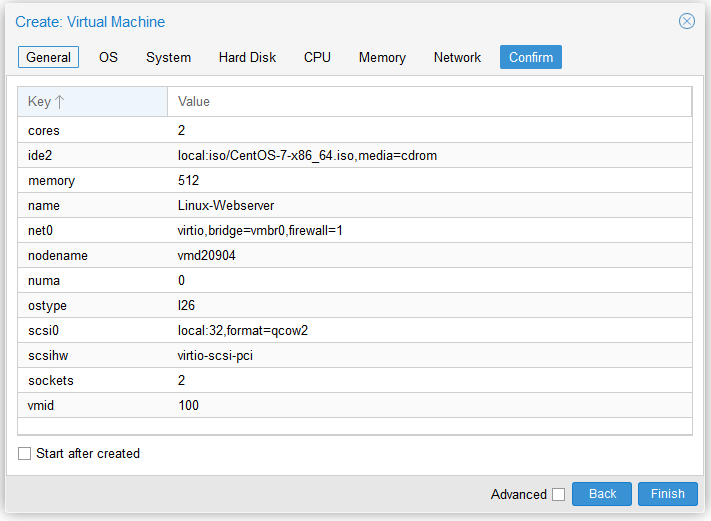
Distribute Resources: Utilize the ‘Hard Disk’, ‘CPU’, and ‘Memory’ tabs to allocate the desired resources to your VM. The number of ‘Total Cores’ is calculated by multiplying the number of sockets by the number of cores.
-
Review and Finalize Configuration: The last tab provides a summary of the chosen parameters. Once satisfied with the configuration, click on ‘Finish’ to create the VM.

Starting and Installing a Virtual Machine
After successfully creating the VM, you can start it and proceed with the operating system installation.
-
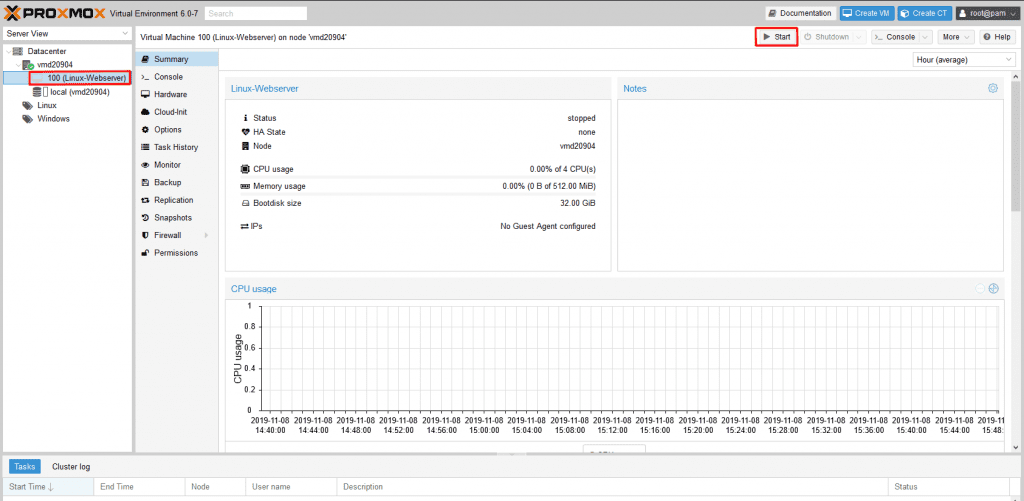
Initiate VM Startup: Within the server and pool overview, select the newly created VM. Click on the ‘Start’ button located in the upper right corner of the web interface to power on the VM.

-
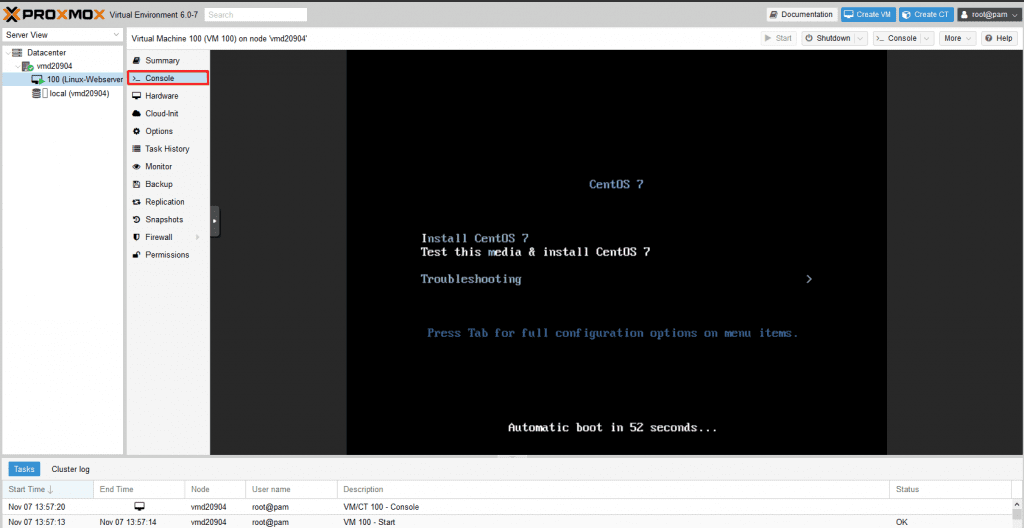
Access the Console: Once the VM has started, navigate to the ‘Console’ menu item. The VM’s screen will be displayed, allowing you to interact with it using your keyboard and mouse.
-
Perform Operating System Installation: The installation process itself depends on the chosen operating system and does not differ from a physical system installation. Follow the on-screen instructions to complete the installation.

Managing Virtual Machines in Proxmox
Proxmox simplifies the management of virtual machines, providing a comprehensive set of tools to monitor, configure, and control your VMs.
-
Stopping and Suspending VMs: To halt or temporarily suspend a running VM, select the VM in the server and pool overview and click on the ‘Stop’ or ‘Suspend’ button.
-
Resetting VMs: If a VM encounters issues or needs a clean restart, use the ‘Reset’ button to forcefully restart the VM.
-
Migrating VMs: For maintenance purposes or to balance resource utilization, you can migrate VMs between nodes within a Proxmox cluster. The ‘Migrate’ button initiates the migration process.
-
Removing VMs: When a VM is no longer needed, it can be safely removed using the ‘Remove’ button.
Utilizing Proxmox Pools for Organized VM Management
Proxmox Pools offer a convenient way to organize and manage virtual machines based on specific criteria, such as project requirements or resource allocation.
-
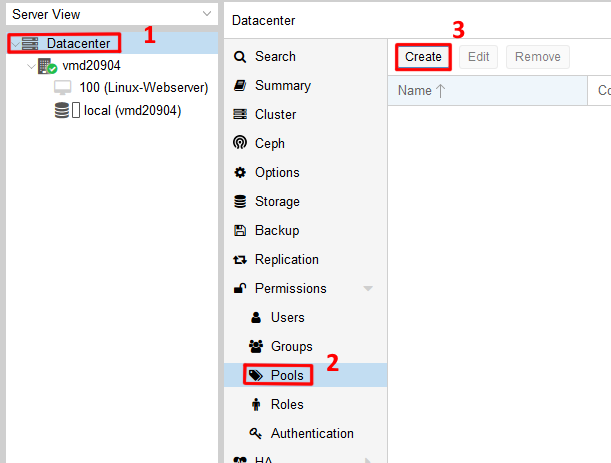
Creating Pools: To create a new pool, select ‘Datacenter’ (1) in the menu bar. Navigate to the ‘Pools’ submenu within ‘Permissions’ (2) and click on the ‘Create’ button (3). Provide a descriptive name and comment for the pool.

-
Assigning VMs to Pools: Virtual machines can be assigned to pools by selecting the pool and clicking on the ‘Members’ menu item. Use the ‘Add’ and ‘Remove’ buttons to manage VM assignments.

Implementing Regular Backups for Data Protection
Regular backups are crucial for safeguarding your virtual machines and their valuable data. Proxmox offers two primary backup methods: snapshots and vzdump.
-
Snapshots: Snapshots capture the current state of a VM, allowing you to revert to a previous point in time if needed. To create a snapshot, select the VM and click on the ‘Snapshots’ menu item. Use the ‘Create’ button to generate a new snapshot.
-
vzdump: The vzdump command provides a comprehensive backup solution, creating a complete image of the VM, including its configuration and data. To initiate a backup using vzdump, open an SSH connection to the Proxmox host and execute the command:
vzdump -all -dumpdir /mnt/backup -mode -snapshot
Replace ‘/mnt/backup’ with the desired backup directory.
Keeping Proxmox Up-to-Date
Maintaining an up-to-date Proxmox system ensures optimal performance, security, and compatibility. To update Proxmox, connect to the host via SSH and execute the following command:
apt-get update && apt-get upgrade
This command updates the package index and installs the latest updates for Proxmox and its components.
Conclusion
Proxmox has established itself as a powerful and versatile virtualization platform, offering a user-friendly interface, robust features, and open-source flexibility. This comprehensive guide has provided a solid foundation for navigating the Proxmox environment, enabling you to effectively manage virtual machines, organize them using pools, and safeguard data through regular backups. Whether you’re a seasoned IT professional or a novice venturing into the world of virtualization, Proxmox empowers you to harness the efficiency and flexibility of virtualized computing.
For additional step-by-step guidance or clarification, you can refer to our comprehensive guide for more help.


