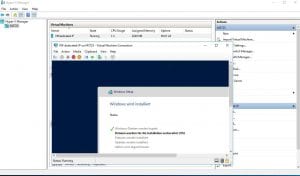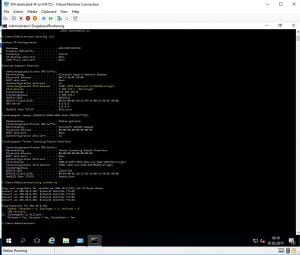
Welcome to this comprehensive guide on installing and configuring Windows Hyper-V 2016 on your dedicated server. This tutorial will walk you through the step-by-step process of setting up Hyper-V, creating a virtual machine, and configuring the network settings to ensure your VM can access the internet.
Prerequisites
Before you begin, you will need the following:
- A dedicated server with Windows Server 2016 installed
- Administrative privileges on the server
- An ISO image of the operating system you want to install on the virtual machine
- A public IP address for the virtual machine (if you don’t have one, contact your hosting provider)
Installing Hyper-V
Step 1: Add the Hyper-V Role
- Open the Server Manager on your dedicated server.
- Click on the “Manage” menu in the top left corner.
- Select “Add Roles and Features” from the drop-down menu.

- In the “Add Roles and Features Wizard” window, select “Role-based or feature-based installation” and click “Next”.
- On the “Select destination server” page, make sure your dedicated server is selected and click “Next”.
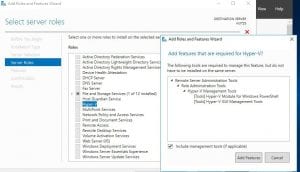
- On the “Select server roles” page, scroll down and check the box next to “Hyper-V”.

- Click “Add Features” to install any additional required features.
- Click “Next” to proceed.
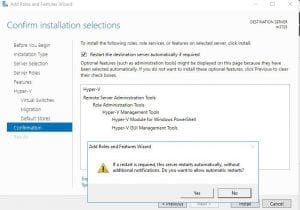
- On the “Confirmation” page, review the selected roles and features and click “Install”.

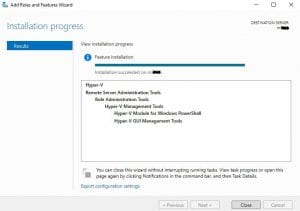
- Wait for the installation to complete.

Step 2: Configure Virtual Switch Manager
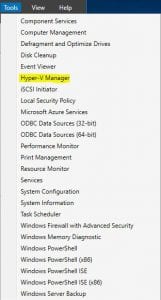
- In the Server Manager window, click on the “Tools” menu.
- Select “Hyper-V Manager” from the drop-down menu.

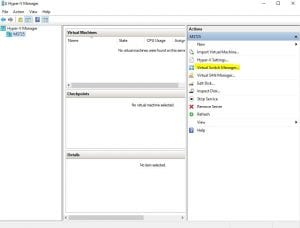
- In the Hyper-V Manager window, click on the “Actions” menu.
- Select “New” and then “Virtual Switch Manager”.

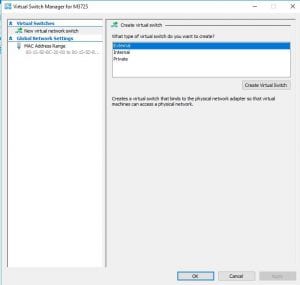
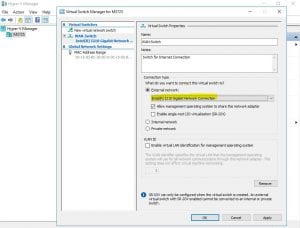
- In the “New Virtual Switch” window, enter a name for your virtual switch, such as “External Switch”.
- Select “External” under “Switch type”.

- Check the box next to “Allow management operating system to share this network adapter”.

- Click “OK” to create the virtual switch.
Configuring the Network
Step 1: Set Static IP Address for the Dedicated Server
- Right-click on the network icon in the taskbar and select “Open Network and Sharing Center”.

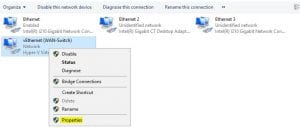
- Click on “Change adapter settings”.
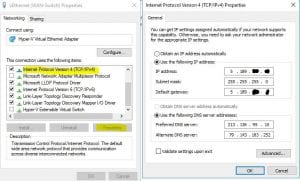
- Right-click on the network adapter you want to configure and select “Properties”.

- Double-click on “Internet Protocol Version 4 (TCP/IPv4)”.
- Select “Use the following IP address”.
- Enter the IP address, subnet mask, default gateway, and DNS server addresses provided by your hosting provider.

- Click “OK” to save the settings.
Step 2: Set Static IP Address for the Virtual Machine
- Open the Hyper-V Manager.
- Right-click on the virtual machine you created and select “Settings”.
- Click on the “Network Adapter” tab.
- Select the virtual switch you created earlier.
- Click on the “Advanced Features” button.
- Under “DNS Server Settings”, select “Specify DNS server addresses”.
- Enter the DNS server addresses provided by your hosting provider.
- Click “OK” to save the settings.
- Start the virtual machine.
- Once the virtual machine is running, log in to the operating system.
- Open the network settings in the virtual machine.
- Set the static IP address, subnet mask, default gateway, and DNS server addresses provided by your hosting provider.
- Save the settings and reboot the virtual machine.
Creating a Virtual Machine
Step 1: Create a New Virtual Machine
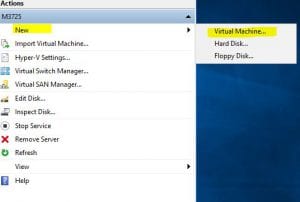
- In the Hyper-V Manager window, click on the “Actions” menu.
- Select “New” and then “Virtual Machine”.

- In the “New Virtual Machine Wizard” window, click “Next”.
- Enter a name for your virtual machine.
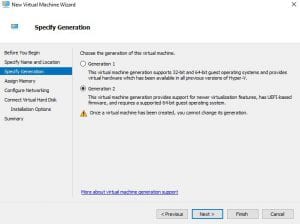
- Select the generation of the virtual machine (Generation 2 is recommended for Windows 8 and later).
- Click “Next”.

- Specify the amount of RAM you want to allocate to the virtual machine.
- Click “Next”.

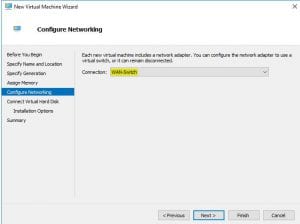
- Select the virtual switch you created earlier for the network adapter.
Step 2: Mount the Installation Media
- Select the ISO image of the operating system you want to install on the virtual machine.
- Click “Next”.

- Select the storage location for the virtual machine’s hard drive.
- Click “Next”.
- Choose the desired startup options for the virtual machine.
- Review the summary of your virtual machine settings and click “Finish”.
Step 3: Install the Operating System
- The virtual machine will boot from the ISO image and start the installation process.
- Follow the on-screen instructions to complete the installation of the operating system.
Step 4: Set Up a Public IP Address for the Virtual Machine
- Once the installation is complete, log in to the operating system on the virtual machine.

- Open the network settings in the virtual machine.
- Set up a public IP address that has been assigned to your dedicated server account.
- Save the settings and reboot the virtual machine.
Testing the Virtual Machine
- After rebooting, verify that the virtual machine can access the internet by opening a web browser.
- You can also test connectivity by pinging an external server, such as 8.8.8.8 (Google DNS).
Conclusion
Congratulations! You have successfully installed and configured Windows Hyper-V 2016 on your dedicated server and created a virtual machine with a public IP address. You can now use Hyper-V to deploy and manage multiple virtual machines on your dedicated server, providing you with a flexible and scalable virtualization environment.


