

In the realm of virtual machines, partition layout plays a crucial role in optimizing resource utilization and enhancing overall performance. Whether you’re managing a VPS (Virtual Private Server) or a VDS (Virtual Dedicated Server), the ability to modify partition layouts provides the flexibility to create new partitions, extend existing ones, and allocate storage space efficiently. This comprehensive guide will equip you with the necessary knowledge and step-by-step instructions to effectively manage your VPS and VDS partitions, ensuring that your virtual environment operates at its peak efficiency.
Prerequisites
Before you begin, you will need the following:
- A VPS or VDS with a freshly installed operating system
- SSH access to your VPS or VDS
- A basic understanding of Linux or Windows commands
Linux
Step 1: Boot into the Rescue System
- Boot your VPS or VDS into the rescue system. This can be done within your Server Gigabit customer control panel.
- You will need to connect through VNC.
- After you have established a connection, login as “root”.
Step 2: Start GParted
- To perform changes on the partition easily, we are going to use GParted.
- To start the GUI, type “startxfce4” within your VNC console and wait a few seconds until the graphical interface appears.
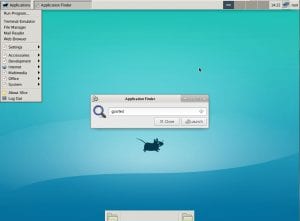
- On the upper left side, you will see “Applications”. Open it and select “Run Program”.
- Now type “gparted” within the application finder and the app should start immediately.

Step 3: Shrink or Extend Partitions
- You should find an overview of all existing partitions on your hard disk drive.
- If you need to shrink a partition to free up space, right-click on the partition and select “Resize/Move”.

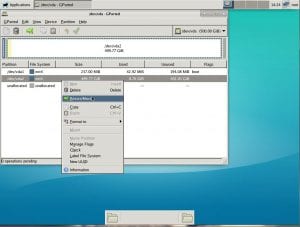
- In the Resize/Move dialog box, you can specify the new size of the partition.
- Click “Resize/Move” to apply the changes.
Step 4: Create New Partitions
- If you have unallocated space on your hard drive, you can create new partitions.
- Right-click on the unallocated space and select “New”.

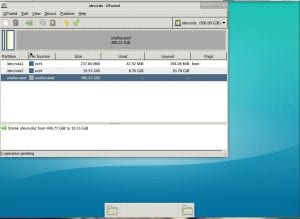
- In the New Partition dialog box, you can specify the size, filesystem type, and other options for the new partition.
- Click “Add” to create the partition.
Step 5: Apply the Changes
- Once you have made all of your changes, click the green checkmark button to apply them.
- A warning will appear, stating that you could lose data if the changes are not applied correctly.

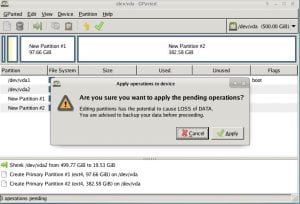
- Make sure you have a backup of your data before proceeding.
- Click “Apply” to apply the changes.

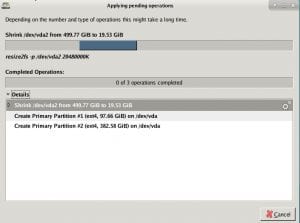
Step 6: Reboot
- Once the changes have been applied, you can reboot your VPS or VDS.
- After the reboot, your new partition layout will be in effect.
Additional Step for LVM
If you’re managing your partitions with Logical Volume Management (LVM), you need to not only extend the size of the partition itself, but also of the Logical Volume (LV).
- Connect via SSH and perform the following additional steps:
- Bring online the LV:
sudo lvchange -a y cos
- Print the available (free) storage capacity within the LVM, in this case it is 300 GB:
sudo vgs
- Extend the volume to use 100% of the available storage capacity:
sudo lvextend /dev/cos/root -l +100%FREE
Windows
Step 1: Connect to Your Server
- Connect to your server using RDP.
Step 2: Open Disk Management
- Open the “Disk Management” utility.
- This can be done with a right-click on the Windows Icon on the lower left side.
- You could also start it by opening the “run” prompt, which can be done via “Start” -> “Execute” -> “diskmgmt.msc”.
- Alternatively, the “Execute” dialogue can be opened by hitting “Windows-Logo-Key +R”.

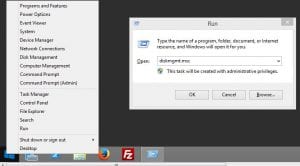
Step 3: Shrink or Extend a Volume
- In the Disk Management utility, you can shrink or extend a volume.
- To shrink a volume, right-click on the volume and select “Shrink Volume”.

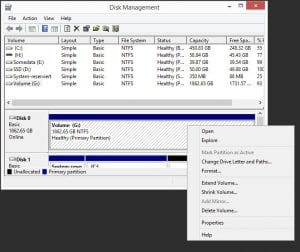
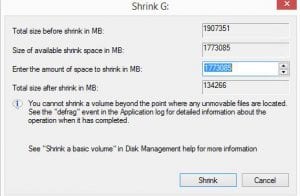
- In the Shrink Volume dialog box, you can specify the amount of space you want to free up.
- Click “Shrink” to apply the changes.

- To extend a volume, right-click on the volume and select “Extend Volume”.
- In the Extend Volume Wizard, you can specify the amount of space you want to add to the volume.
- Click “Finish” to apply the changes.
Step 4: Create a New Partition
- If you have unallocated space on your hard drive, you can create a new partition.


- Right-click on the unallocated space and select “New Simple Volume”.
- In the New Simple Volume Wizard, you can specify the size, filesystem type, and other options for the new partition.
- Click “Finish” to create the partition.
Step 5: Reboot
- Once you have made all of your changes, you can reboot your VPS or VDS.
- After the reboot, your new partition layout will be in effect.
Conclusion
In this tutorial, you learned how to change the partition layout of your VPS or VDS after installation. This can be a useful task for a number of reasons, such as creating new partitions, extending existing partitions, or freeing up space for a new operating system.
