In today’s world of technology, it is important to keep your Server Gigabit Windows Dedicated Server up to date with the latest features and functionality. Recently, Server Gigabit introduced the Satellite feed upgrade, which allows you to receive transponder signals on your Dedicated Server via the SAT>IP protocol. This tutorial will show you how to configure the Satellite feed on your Dedicated Server.
Prerequisites
Before you begin, you will need the following:
- A Server Gigabit Windows Dedicated Server
- The Satellite feed upgrade email containing the IP addresses
- A third-party SAT>IP software (e.g., DVBViewer)
Steps
Step 1: Set Up the Network Configuration
Connect to your server using Remote Desktop.
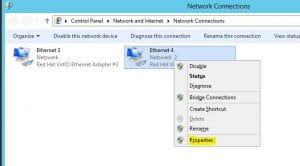
Navigate to your network adapters and right-click on the corresponding interface. Select “Properties”.
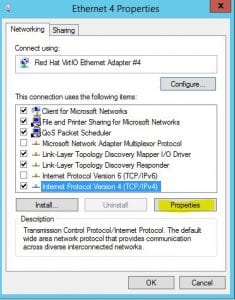
Select the TCP/IPv4 protocol and click on “Properties”.
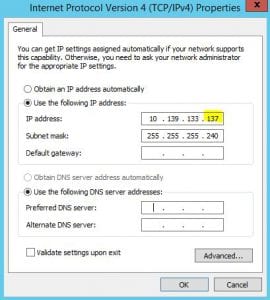
Enter the IP address that was sent to you via email.
Add a route in Windows by opening the Command Prompt as an administrator and typing the following:
route print -4
Identify the adapter ID for the SAT>IP interface. In the example provided, the adapter ID is 19.

Create the route using the following command:
(example)
route add 10.139.133.0 mask 255.255.255.240 10.139.133.1 if 19 -p
Step 2: Verify the Connection
Open the Command Prompt and check if the server replies to “ping” using the following command:
ping -t 10.139.133.2
If the SAT>IP Server does not reply, contact Server Gigabit’s support team for further assistance.
Step 3: Install and Configure Third-Party Software
Install the third-party SAT>IP software of your choice. In this tutorial, we will use DVBViewer.
Open DVBViewer and navigate to “Settings”.
Enter the IP address of the SAT>IP server.
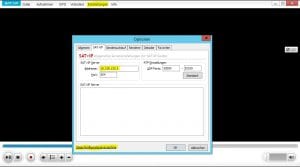
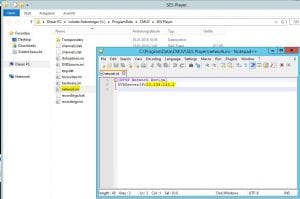
Click on “Navigate to configuration directory” and edit the network.ini file.
Insert the SAT>IP server’s IP address into the following line:
[RTSP Network Device]
DVBServerIP=10.139.133.2
Step 4: Save and Restart
Save the network.ini file and restart the DVBViewer application.
You should now be able to watch TV on your Dedicated Server.
Conclusion
Congratulations! You have successfully set up the Satellite feed on your Server Gigabit Windows Dedicated Server. Enjoy watching TV from the comfort of your own server!

Additional Information
- For more information on the Satellite feed upgrade, please refer to the Server Gigabit Knowledge Base.
- Please note that the IP addresses used in this tutorial are examples. Always use the data provided in the email for the configuration of your server.
Table of Commands
| Command | Description |
|---|---|
| route print -4 | Displays the routing table |
| ping -t 10.139.133.2 | Pings the SAT>IP server to verify the connection |
| route add <ip address> mask <subnet mask> <ip address> if 19 -p | Adds a route to the SAT>IP server |

